Wednesday, March 31, 2021

Eight Photoshop Visual Pranks To Try on April Fools’ Day

Tomorrow is April Fools’ Day, and with such a bummer of a year leading up to this point (and things are only now just starting to look better in a few places), everyone could use some laughs. To that end, photographer Richard Wakefield shows how you can create eight visual jokes in Photoshop.

Some people have mixed feelings about April Fools’ Day jokes, but Wakefield believes you shouldn’t let yourself worry about that too much.

“Over the recent decades, elaborate pranks have appeared on radio and TV stations, newspapers, and websites, and by many major companies. A personal favorite was the infamous ‘spaghetti tree’ which was a three-minute hoax, broadcast by the BBC in 1957!” he says.

The photography industry has typically had a pretty good time with April Fools’ day, though as you might expect 2020 wasn’t really the right climate. But in 2019, Shutterstock announced a brick-and-mortar stock library, Nikon was said to be gearing up to release a new instant camera as well as a left-handed DSLR, and Sony announced the Alpha 8S. The creativity of the industry is on full display on April Fools’ Day, and Wakefield believes you’re only a tutorial away from taking part in it yourself.

“I for one will be announcing a small local flooding, sudden road cracks and sinkholes, and the fact I’ve got a sudden and impressive six-pack despite never working out,” Wakefield continues. “Also, my personal challenge will be to see how many fall for the ‘space-saving,’ two-wheeled, mini-buses I conjured up.”

Wakefield additionally shows how to make a few other fun visual gags, the results of which are below. In the case of all his images, Wakefield compiled some stock images, 3D objects, and took photos around his local town in preparation for the shenanigans.

Wakefield says that if you do try any of his hoaxes to remember that traditionally April Fools’ pranks can only be played up until midday on the first of April, after which he says you should come clean about any jokes people may have taken seriously.

For more from Richard Wakefield, make sure you follow him on Facebook and Instagram, subscribe to his YouTube Channel, and see more of his work on his website.

How to Correctly Use Creative Profiles in Adobe Lightroom and Photoshop

A few weeks ago, I was speaking with a good friend — who is also a heck of a photographer — about the pros and cons of using creative profiles and presets as part of your photo editing workflow. His stance was unambiguous and straightforward: as far as he’s concerned, profiles and presets are murderers of creativity.

He believes that they end up being a crutch that photographers initially lean on and, eventually, depend on. While I can certainly appreciate his point of view, my perspective has a bit more cushion to it.

In some cases, presets and profiles can significantly speed up batch edits — especially if the changes are rote. I know plenty of wedding and portrait photographers who have a set of presets that they batch apply for more corrective changes than stylistic ones and it is a boon for their productivity. Personally, I’ve found a happy place in my editing workflow where profiles serve as a stylistic springboard of sorts that quickly provides me with a variety of directions to take my photos, some of which I may never have considered.

Depending on who you speak with, you’ll probably find photographers in one of three camps when it comes to using creative profiles and presets:

  1. Those photographers who, under no circumstances, would ever apply a creative profile on their photos.
  2. Those photographers who see the benefit of creative profiles and often use them with their photos.
  3. Those photographers who fall somewhere in between and either only use profiles that they’ve created for themselves or use them sparingly.

The truth is that there is no one camp that has anything over the other two. If you are the sort of photographer who prefers a manual touch to every single photo, then profiles may not be for you. I’m of the belief that creative profiles are wonderful and have often inspired me in terms of which stylistic direction I want to take my photo. I’m open-minded enough to allow myself to be inspired in that way and I can also see how that would be a turn-off for another type of photographer.

Regardless, one of the biggest problems I see when it comes to photographers who utilize creative profiles is how they use them. At the risk of sounding overly binary, I emphatically believe that there is a right way and a wrong way to use creative profiles. In almost all cases that I’ve seen, the wrong way usually involves not knowing how to apply restraint in the strength (or presence) of the profile. In other cases, the photographer falls into a creative trap by using the same profile on all of their images, resulting in an overly homogenous collection.

That’s why I recorded the video above. I think there’s so much potential with creative profiles… when they’re used correctly.


About the author: Brian Matiash is a professional photographer, videographer, and published author based in Coeur d’Alene, Idaho. His passion is to serve other photographers by helping them grow their own visual pursuits. Learn more about Brian by visiting his website, on Instagram, and on YouTube.

Apple’s iPhone 13 To Have Mixed Bag of Camera Upgrades: Report

Ming-Chi Kuo, a credible Apple analyst, has told investors that the iPhone 13 lineup that is slated for release in the second half of 2021 will feature the same wide-angle lens as the current iPhone 12, but the ultra-wide will likely see an upgrade.

Kuo, who has been cited numerous times in the past and was responsible for the report that Apple won’t be implementing periscope technology into its camera array for at least a few years, recently provided a note to investors that discusses Apple’s plan for the 2021 iPhone release.

In the note, which was obtained by MacRumors, Kuo says that the iPhone 13 mini, iPhone 13, and iPhone 13 Pro will feature the same wide-angle lens with the f/1.6 aperture as the current iPhone 12 series does. The iPhone 13 Pro Max, the largest of Apple’s smartphones, will have a marginally improved f/1.5 aperture wide-angle lens, which is only slightly better than the f/1.6 lens on the current Pro Max.

Apple introduced a larger sensor in the iPhone 12 Pro Max in 2020.

Curiously, Kuo seems to indicate that the iPhone mini will still be a product launched this year despite tepid consumer response. The poor sales are a shame, as the iPhone mini actually has a lot of desirable features that make it unique in the current landscape of large phones, and seeing that Apple may still produce it is a good sign for those who enjoy the smaller form factor.

While that is a disappointment, MacRumors cites a different source — Barclays analysts — says that the ultra-wide-angle lens is seeing a notable improvement over the current generation devices to an f/1.8 aperture over the f/2.4 aperture found on the iPhone 12 devices.

Additionally, the size of the camera sensors in the iPhone 13 Pro and 13 Pro Max is expected to increase according to Ross Young, a well-respected display analyst according to MacRumors. It’s not clear which of the cameras would be targetted for the upgrade, but any camera equipped with a larger sensor is sure to improve the image quality.

While the latest rumors don’t offer a lot to get excited about, Apple has been able to do quite a bit with its computational photography to squeeze the most out of the same small sensors it has been using for several phone generations. Any physical improvements are bound to make noticeable changes to image quality, even if on paper they don’t seem particularly exciting.

Canon Appears to be Rapidly Discontinuing its DSLR Lenses

Canon appears to be rapidly discontinuing its EF-mount DSLR lenses this year, likely as the company focuses on its mirrorless offerings. Five popular lenses have been marked as “no longer available” at some retailers including popular optics like the 85mm f/1.2L USM II and the 70-200mm f/4L IS USM II.

As noted on a running list on Canon Rumors, the company reportedly started discontinuing lenses in February with the EF 40mm f/2.8 STM. That list has been growing at a surprising pace, with the 60mm f/2.8 Macro USM, 70-200mm f/4 L IS USM II, 85mm f/1.2L USM II, and 200mm f/2L I USM all joining inside the last two months.

While the 70-200mm f/4L IS USM II and the 85mm f/1.2L USM II both have RF lens equivalents available in the RF 70-200mm f/4L IS USM and RF 85mm f/1.2L USM (also the more specialized Canon RF 85mm f/1.2L DS USM), the other three lenses on the list do not have a direct replacement yet.

PetaPixel reached out for comment but no information was available ahead of publication. So while it appears that Canon is actively moving away from the production of EF lenses, that speculation was unable to be confirmed.

Canon’s initial strategy for mirrorless appeared to be based heavily on optics. After the launch of the EOS R — which was met with modest critical acclaim at the time other — Canon quietly expanded its lens library out to an impressive level, which eventually made both the R5 and R6 more attractive choices when they were announced last year.

At the time of publication, Canon’s full RF lens lineup had reached 19 total optics (including the 1.4x and 2x teleconverters) and covers a wide range of focal lengths. While there certainly is room for improvement, most photographers will be able to find something in the current RF lens offering to meet their needs. Still, it is a bit troubling to see lenses discontinued without a direct mirrorless alternative available.

While these discontinued lenses aren’t available from all retailers, stock of them is still likely to exist in some stores for at least a little while for those who are determined to grab the last of a dying breed. For example, the 70-200mm f/4 L IS USM II is still available to purchase at the time of publication, but we may be in our last days of being able to easily buy it new.

How to Shoot an Apple-style Product Photo with Flashes and DIY Modifiers

If you’ve ever wanted to learn how to shoot product photos like those seen in Apple advertisements, here’s a short 4-minute tutorial by photographer Karl Taylor that you can do at home with just a couple of speedlights and homemade modifiers.

The tutorial came about after Taylor challenged students in his online education program to capture the best Apple EarPods photo they could based on his brief, and Taylor took up the challenge himself as well.

“I decided to up the ante and try and do it with just speedlights. In doing so, I came up with some great tips [to show] how to ensure the product still retained a gloss look and remained empowering, highly detailed, and utilizing a manageable shooting position.

“I was very excited by the results and what could be achieved with a little creative thinking and problem solving.”

Among the things you’ll need for this shoot are a camera, a macro lens, two speedlights, scissors, white paper, headphones, black card, white acrylic, and white tack.

The black card is cut into the shape of your headphones, and the white paper is cut into reflectors. The headphones are stuck to the black card with the white tack.

A semi-transparent sheet of 5mm white acrylic is used for diffusing the light. A window mask is placed in front of your lens to reduce flare, and a number of reflector panels are placed in various positions above and around the headphones to add gloss highlights.

Taylor lit headphones’ speaker grills separately in their own photos to bring out the details.

Once the photos are captured, you’ll need to bring them into Photoshop to clean them up and put them on a black background.

Here’s Taylor’s polished final result:

“It’s a great setup to try if you’re looking to capture professional product photography but only have limited equipment,” Taylor says.

If you enjoyed this tutorial, you can subscribe to Taylor’s content on YouTube or sign up for his educational platform.


Image credits: Video, still frames, and photo by Karl Taylor and used with permission

The Curiosity Rover Took a Massive 318-Megapixel Selfie On Mars

While NASA’s Mars Perseverance Rover has been grabbing headlines lately, its Curiosity rover has been on the Red Planet since 2012 and just sent back a gigantic 318-megapixel selfie that depicts it in front of Mont Mercou, a rock outcropping on the surface of Mars.

NASA says that in order to create this finished image, the rover needed to use two different cameras.

“The panorama is made up of 60 images taken by the Mars Hand Lens Imager (MAHLI) on the rover’s robotic arm on March 26, 2021, the 3,070th Martian day, or sol, of the mission. These were combined with 11 images taken by the Mastcam on the mast, or “head,” of the rover on March 16, 2021, the 3,060th Martian day of the mission,” NASA explains.

You can download the massive 105.2MB full resolution image here.

There is a small hole in the ground just to the left of the rover in the image above, and that is where it used a robotic drill to pull in a sample. This particular rock sample is nicknamed “Nontron,” as the Curiosity team is nicknaming features in this part of Mars using names from the region around the village of Nontron in southwestern France.

The Curiosity Rover has been sending back selfies now for almost a decade. In 2013, the Curiosity rover sent back a stunning self-portrait showing both the surface below the rover as well as the dust-filled sky. The next year, the rover celebrated its one-year anniversary with another selfie taken from a closer perspective.

As noted by DIY Photography, the Curiosity Rover has also recently sent back a couple of other panoramic images from its location, including a three-dimensional stereoscopic photo. The rover used its Mastcam instrument to take the 32 individual images that make up this panorama of the Mont Mercou outcropping and combined it with a second panorama that it captured from 13 feet to the side.

The gif below illustrates the three-dimensional effect:

“Both panoramas were taken on March 4, 2021, the 3,049th Martian day, or sol, of the mission, from a distance of about 130 feet (40 meters) from the cliff face, which is about 20 feet (6 meters) tall,” NASA writes. “They have been white-balanced so that the colors of the rock materials resemble how they would appear under daytime lighting conditions on Earth.”


Image credits: NASA/JPL-Caltech/MSSS

What It Was Like Photographing China’s Extreme Sandstorm

On Monday, March 15, 2021, a record-breaking sandstorm descended on northern China, engulfing cities including the Chinese capital, Beijing. In recent decades, northern China has suffered from sandstorms as a result of increasing desertification in the north of the country which is largely dry, arid, and covered with deserts.


“Why is the sky orange?”

I pulled the sheets from around my eyes and looked at my daughter. “What do you mean?” I said.

“The sky. It’s orange,” she stated in a very matter-of-fact way.

I rolled over and pulled the curtain to one side. I peered through my half-awake eyes out onto the streets of Beijing which were shrouded by a distinctive orange haze. It was like the city had been dipped and soaked in a cup of English tea, leaving a sepia tone to everything that it had touched.

“I think it might be a sandstorm,” I said in surprise. She stood in silence and looked puzzled.

The confusion was understandable. The last time a sandstorm had descended on Beijing was well before she was born. It was the first time she, and many other children in Beijing, were waking up to the sight of orange sand-filled skies.

As a photographer, I did what you might expect I did. I went out immediately into the sandstorm to begin photographing.

For the past 15 years, my work has focused mainly on telling stories about the climate crisis and global environmental issues. Normally, I travel far and wide across the Asia-Pacific region to document these issues. This time, however, I was in the middle of an environmental crisis right in the city where I live.

As I ventured out into the sandstorm to begin making pictures, I began to reflect on the last time I had photographed a sandstorm in China. In 2009, I embarked on a six-week overland journey traveling from Beijing to the far west of the country to document the problems China was facing due to increasing desertification.

Desertification is the conversion of arable and habitable regions into either deserts or arid land. It’s caused by a myriad of factors including climate change, inappropriate agricultural practices, and water mismanagement. It often results in the creation of more dry and degraded land which is prime territory for the creation of sandstorms. During this journey, I photographed many sandstorms as I made my way through some of the country’s worst-hit regions.

Over a quarter of China’s northern and western regions are covered with desert and/or arid land, so sandstorms have long been a problem in the north of the country. While they continue to plague those remote regions of China, Beijing has suffered fewer in the past decade, largely due to aggressive reforestation efforts near the capital. This month’s sandstorm, however, was a clear reminder that sandstorms are still a threat to this region.

The winds were high as I made my way out into the morning rush hour. Particles of dust and sand were being whipped through the trees at high speed, lashing the pedestrians shuffling along the street trying to make their way to work. Masks covered people’s faces and coats were drawn over heads, as people tried their best to shield themselves from the orange windy onslaught.

Making pictures in these conditions is difficult. The first thing you notice is the sand and dust getting into your eyes. Within minutes it feels like you are peering through eyelids tinged with abrasive edges that dry your eyes with every blink.

The sandstorm was loaded with harmful particulates, mainly classified as PM10 (less than 10 μm in size) and PM2.5 (less than 2.5 μm in size). Sand makes up the former and dust makes up the latter. It’s the PM2.5 particulates you really need to worry about because they are small enough to get deep into your lungs. As such, a heavy-duty air filter mask is mandatory in these conditions.

When out in it, you also notice that your camera quickly develops a fine layer of sand and dust on its surface. Changing lenses is almost out of the question, as the fear of that dust getting into the camera, where it may not be able to be cleaned out, is too great.

I plowed on through the storm. Commuters were either rushing to get to work or rushing to get out of the storm, so most ignored me as I lingered in interesting places and try to make images of them.

I tried to get low so that I could frame the full extent of the orange sky in the pictures. The sun barely peeked through the sand and dust, as I positioned figures in my pictures in an attempt to show the relationship between people and this dystopian environment that had befallen the city.

I lasted about two and half hours before I felt I had spent long enough in the sandstorm. The conditions had become wearying and I felt I had made enough pictures that captured the feeling of being within it.

The pictures here, along with the video above, show you what it is like to experience this extreme weather event. Desertification is an environmental issue that isn’t covered much in the mainstream news but extreme sandstorm events like this remind us that it is a constant threat. It’s also not just an issue that faces China. Deserts are expanding across the world and as our planet warms, it’s an issue that will be facing many more of us in the future.


About the author: Sean Gallagher is an independent photographer and documentary filmmaker. Originally from the UK, he has been based in the Asia-Pacific region for over 15 years covering issues surrounding the climate crisis and global environmental crises. He is a Fellow of the Royal Geographical Society and his work has on environmental issues has appeared with National Geographic, The Guardian, and Smithsonian Magazine. For more from Sean, you can follow him on Instagram.

This is Why You Don’t Store Expensive Electronics on Cheap Shelves

If you’re in a business where you need to keep an inventory of expensive cameras and electronics, make sure you find storage shelves that are up to the task. One business learned that lesson the hard way through an unfortunate incident that was caught on camera.

Here’s a short 16-second clip that was caught on an unnamed business’ CCTV camera back in 2016 (warning: there’s some loud music on the clip):

The man in the clip was facing one row of shelves when his back barely bumped the shelf behind him on which some camera equipment, including a couple of Fujifilm X Series mirrorless cameras, is sitting. Those two rows of shelves slow start tipping over before they completely collapse, causing the other shelves in the area to fall over as well.

Gadgets these days are generally packed well enough for them to easily survive this type of tumble — they almost certainly receive rougher handling during the shipping process — but cleaning up this type of mess is not a fun thing to do.

So the next time you need to buy some shelving, consider paying a little more for heavy-duty shelves that can withstand both heavy loads as well as a good amount of lateral force (or if you must use weaker shelves, try adding some diagonal bracing to prevent this kind of tipping).

Ilford Launches the Ilfocolor Rapid Retro Edition Disposable Camera

Ilford Imaging is jumping back into the production of disposable cameras with the announcement of its Ilfocolor Rapid Retro Edition Single Use Camera. The brightly-colored camera supposedly pays homage to Ilford’s past with its range of Ilfocolor negative films.

It should be noted that this is a product from Ilford Imaging, which is not to be confused with Ilford Photo — a different company owned by Harman that has been producing disposable cameras for some time.

The Ilfocolor Rapid Retro Edition comes pre-loaded with 27 exposures of ISO 400 color negative film and a fixed-focus 31mm f/11 lens with a fixed shutter speed of 1/125 second. The camera supposedly will capture sharp images as close as 1 meter away. The Ilford Rapid also comes with a AAA battery that powers the classic disposable camera flash that has a 15-second recycle time.

This particular retro edition camera is a throwback to the 1960s not just in its design but also in the color negative film that it comes loaded with. According to Decisive Moment, it was surprising that Ilford had not released its own color film from that period after both Kodak and Fujifilm are having such success with the surging demand of both their color films and while this isn’t the same as selling the film separately, it’s still a step in that direction for those who were yearning to use classic Ilford color film again.

Ilford is just the latest in a string of companies jumping back into disposables as they have exploded in popularity recently. Lomography, Yashica, and most recently Fujifilm have all released new versions of single-use cameras lately. Even Supreme is releasing its first limited-edition disposable camera with its logo emblazoned across the body.

The popularity of the format may bring back nostalgia, but it doesn’t solve the issue of waste. Many of these cameras feature plastic parts that, while companies like to claim is recyclable, is often not.

Multiple software companies have tried disposable-themed camera apps that mimic the retro experience in an attempt to capitalize on the craze digitally. The most notable would be the troubled Dispo, which has recently seen an upheaval in its business as allegations of misconduct among his group forced the founder to resign from the board.

The Ilford Rapid Retro Edition disposable camera is currently only listed for pre-order in Australia, where it retails for between AUD18.90 and 19.95, but Inside Imaging quotes that the camera should retail in the United States for $15 when it becomes available in early May.

A Guide to Traveling with Lithium-ion Batteries as a Photographer

I’m photographer Jay P. Morgan from The Slanted Lens. In this video and article, we’re going to take a look at batteries. What you can fly with, what you feel comfortable checking in your check bags, what you should carry on with you, and what you shouldn’t take with you.

Because we have all these batteries, and they’re in all of our equipment and we’re going to fly somewhere, what are the restrictions when it comes to flying with batteries?

Alkaline Batteries

First off, let’s go right to the really basic batteries. If you’ve got the old standard run-of-the-mill batteries like AA, AAA, C, and D – all these batteries. Can you fly with these? Can you check them? Can you carry them on? What can you do? How many can you take with you?

You can take as many of these as you want. You can check them, you can put them in your carry-on, and you can put them in devices. There is no restriction on how many of these batteries you can take with you on an airplane.

Lithium-ion Camera Batteries

Let’s move to lithium-ion. Lithium-ion batteries are in just about everything that we use and this is where the restrictions start to be a little strange. First off, any batteries that go in cameras and are in cameras can be left in the cameras and they are considered no problem whatsoever. So Canon batteries, Sony batteries, even the large one for my C200 is still under 98 watts. They can go in the camera and be left in the camera, and they can be carried on inside the camera or it can be put into the luggage.

If you want to check it you can check it as long as it’s in the camera. Those do not count as batteries that are loose. So you can set those in the camera. Definitely put those in the camera.

These are batteries I use a lot. These are Sony L batteries or NPF batteries. These batteries are seldom installed in anything. As wonderful as these L series batteries are, the problem with them is that they have contacts and they’re rarely ever in anything. Are they a 100-watt battery? No, they’re not. Generally speaking, these larger ones are going to be about a 48-watt battery and the smaller ones maybe like 25 to 30 watt. But they are part of that four battery contingency you can carry on the airplane.

You can carry eight of these and that equals 100 watts for every 2. Because they’re just under 48 watts or just around 48 watts each. So two of 48 watt equals one of the 99 watt. You know four of these equals two of these. I will often carry at least two or three of the 99-watt batteries and about four of the 48 watt. That way I have enough batteries at that point.

Technically speaking, you can’t have a whole bunch of these loose batteries without that becoming part of your lithium-ion battery restriction to carry on to the airplane.

I put all of my batteries in a small zipper case. In the zipper case I will have my Sony or Canon batteries all lined up and all zipped together. I put a label on it that says, “Sony batteries”. I’m not making any secret about what it is. I’ve never been stopped or asked about this at all because it is an enclosed container. It’s zipped. I’ve never had an issue with it.

Lithium-ion Batteries

I get asked this question all the time. I’ve got my Westcott FJ200 and I’ve got my Westcott FJ400 Can I fly with these? And the answer to this question is you can check these without any problem. I check my strobe heads, I checked them all the time.

You can check any battery for a piece of equipment into your checked-in baggage as long as the battery is installed in the device that it runs. So as long as my battery is on my Westcott FJ400 then I can check it. A lot of times I have a case that has 4 FJ400s in it and I check that bag and put it on the airplane in my SKB case. I do that all the time.

Westcott FJ200 and FJ400 strobes.

The minute I separate this, and I now have a battery in my hand, I can’t put it loose in my checked-in baggage. I now have to carry it on. So the best way to carry the batteries for your strobes is to keep them installed on the device. The reason for this is that most batteries that are installed in equipment are 99 or fewer watts. So like the FJ400 battery is about a 65 watt. And the FJ200 battery is about a 45-watt battery.

Those are under the battery restriction level and they are in the device. So there’s no possibility that this is going to accidentally fall against a piece of metal and create some kind of a short and cause a fire. As long as it’s installed in the device, you don’t have to worry about it being an issue on the airplane.

Large Lithium-ion Batteries

For production, we carry larger 99-watt batteries. They are super small V-mount batteries and super lightweight. They are an excellent battery because of their size. These are pretty revolutionary because they’re so small. How many of these can I carry on the airplane? TSA says four, and some airlines say, four to six or eight. So that is a little unclear.

I did some checking with some companies. They say that four to six of the 99 watt batteries are never going to cause a problem for you. If you have eight or ten of them, it’s probably going to start to cause a problem for you. So you definitely can carry four of these without any concern whatsoever.

For batteries that are 99 watt or under 100 watts each you can carry four. You can carry up to 160-watt batteries. And you are allowed up to two 160 watt batteries, not more than two. And you may only carry them on, you may not check them. If you have two 160 watt batteries, and then you start stacking on 99-watt batteries, you’re going to start to have a problem. They’re going to start saying you’re carrying way too much.

Some airlines will give you special permission to carry up to one 300 watt battery, not more than one, over 160 watt and up to 300 watt. But you have to check with the airline, and you have to get written permission from them. Don’t risk it unless you have that, it’ll never work.

Packing Your Batteries

How should you package your batteries when you’re going to travel? You might be wondering to yourself, “Well, why should I package my batteries when I travel?” It just avoids any questions going through TSA and avoids any questions that may come up with the airlines. If they are packaged correctly, most of the time, people are not even going to notice or care. So if you package them like one of these three ways, you’ll just make sure your batteries are going to fly right through and on the airplane with you without any problem.

1. So the number one way is to just simply put them in their original box. If you bring batteries in their original packages, AA, AAA, Cs, etc. in their original packages, you’re never going to have a problem. If you put these 99-watt batteries in the original box and close that box up. It says right on it what it is. When they open it, it is what it says it is. And there’s not going to be any question about that. And it doesn’t look as scary as a big row of batteries in your carry-on case.

2. If you can’t put them in their original packaging, then what I do is I just do something to secure them. Put them in a Ziploc bag. That means that they’re all together and they’re less likely to touch a piece of metal or something and create a short. I do this for my batteries.

3. If you’re going to travel with the battery, you just simply take your battery, take a little piece of electrical tape and tape over the contacts. I use yellow electrical tape because I want them to see it and know that I have taken the time to make sure that battery is not going to have any kind of electrical short.

The mounting bracket is not your contacts on a gold mount battery, these are not electrical contacts. So on a gold mount battery, where would I put that tape, I’d put it right there across that little section there. Now when they open up and look at your bags, your batteries all have tape on them. They’re secured and there’s not a problem.

Travel Smarter and Easier

Here are three great tips helping you travel just a little easier.

1. Number one is get a media badge. This is a great indicator of the fact that you are a professional photographer or videographer, and they’re not going to harass you about your equipment. With a media badge, you can call ahead of time and tell them that you are flying with the media rate. And what that means is that they don’t give you free bags, but they’ll allow your bag, rather than being 50 pounds, to go as high as 90 pounds.

So when you have a bag that you’re checking on the airplane with a ton of equipment in it, that media rate allows you to have that extra weight without having to pay a premium for it and that makes it much easier to fly with your equipment. You are legitimately a business just because you are a business. You don’t have to work for a large corporation. You can work for your own company.

I’ve flown with my media badge many, many times. I have a business card that matches it. So those two together become proof that you are media and if you have your stuff in something like an SKB case or some case that looks like media, it’s not going to be a problem.

2. Number two is get TSA precheck. It’s just an easy thing to do. It lasts for about five years. They are not near as uptight in that precheck line as they are on the other side. So I just think precheck is an absolutely fabulous way to fly. I’ve done that now since it came out. It’s been perfect.

3. And last of all, don’t forget there is the REAL ID and this is something that just makes it even quicker to get through the airports. It means that you’re pre-screened, that they know you’re less of a risk and so carrying the batteries and things are going to be less of an issue for them because they know that you are an individual that they have all your information.

So I think the Real ID is a great thing to have as well.

Conclusion

Just remember that with lithium-ion, you can carry four batteries under 100 watts on the airplane with you. You can’t check them if they’re loose. You can check them if they’re in other devices. You can also take two up to 160 watt or sometimes one 300 watt battery with special permission.

That’s the basics for all battery travel, make sure you tape them up and secure them so they’re not going to be loose. You can get everything on that airplane and go where you need to go.


P.S. If you enjoyed this article, subscribe to our YouTube channel for more content like it.


About the author: Jay P. Morgan is a commercial photographer with over two decades of experience in the industry. He teaches photography through his company, The Slanted Lens, which runs a popular YouTube channel. This review was also published here.


Image credits: Airplane stock photo in featured image licensed from Depositphotos

Sony Updates Visual Story App for iOS With Live Gallery

With the increased demand for remote participation of weddings and events, Sony has updated their Visual Story iOS app to offer Sony camera shooters a Live Gallery viewing experience for guests.

Since the release of Visual Story in December 2020, wedding and event photographers have been able to connect compatible Sony cameras to the app and automatically transfer photos to their iPhones, iPads, or Sony’s cloud service. Further, the transferred photos are then automatically sorted and filtered with the power of AI, allowing the photographer to keep focus on shooting and still have a curated batch of images at the ready once finished for instant delivery.

Now, with Live Gallery being added to the latest version of Visual Story, “instant delivery” takes on new meaning. With the same level of automated curation and specified filters, photo galleries can be updated and viewed in real time by the client’s guests as the event is still happening and the photographer is still at work taking photos. Guests to the Live Gallery can also “like” photos, information that may later be used by the event photographer to make choices on which final images to deliver to the client.

Live Gallery inside the Visual Story app.

Sony has added more selection options for photographers inside the app in order to more quickly find specific images through the use of a new object detection filter. Examples for a wedding photographer would be searching for images that show cake, food, tableware, or jewelry.

New object detection filters in the Visual Story app.

The Visual Story app has a free tier for testing the waters, however there are limits in place including number of projects, galleries, images, and cloud storage space. Two paid tiers are available to increase these limits. The Basic plan runs $20 per month while the Power plan will cost $50 per month. A breakdown of each plan’s offering can be viewed on the Sony website.

Visual Story v1.1 with Live Gallery functionality is now available on the Apple App Store. Photographers will need to have a compatible Sony camera to connect with the app, which includes the a1, FX3, a7C, a7R IV, a7S III, a9, a9 II, and a7 III running the latest firmware.

Sony claims app development for additional platforms is “under discussion.”

Tuesday, March 30, 2021

Vivo X60 Pro+ Review: Zeiss Onboard and Loaded for Bear

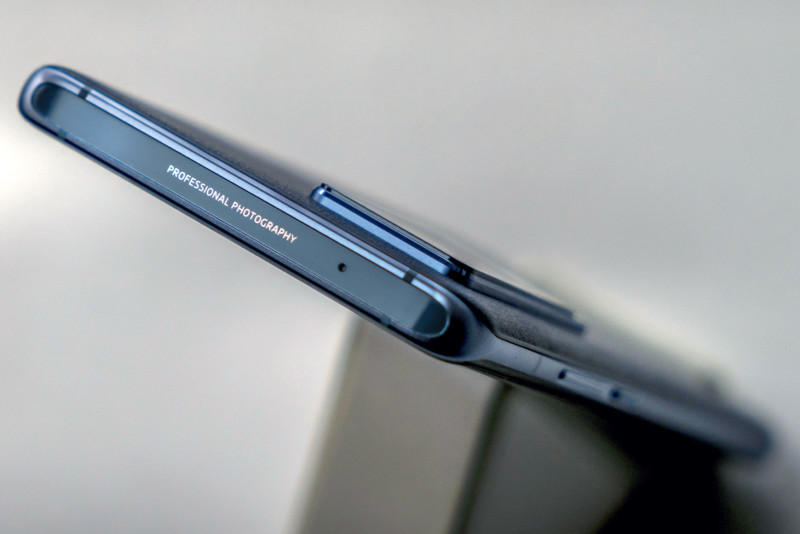
Vivo is positioning its X60 series as “professional photography flagship smartphones,” making clear that it wants to be regarded as the best mobile shooter available. With its partnership with Zeiss, it might have the tools to actually meet that goal.

In North America, it’s the likes of Google, Samsung, and Apple that command so many headlines, but a lot of the innovation in mobile photography is coming from Chinese brands. Alongside Vivo, others like Huawei, Xiaomi, OnePlus, and Oppo are among those testing the waters of what’s possible in phone photography.

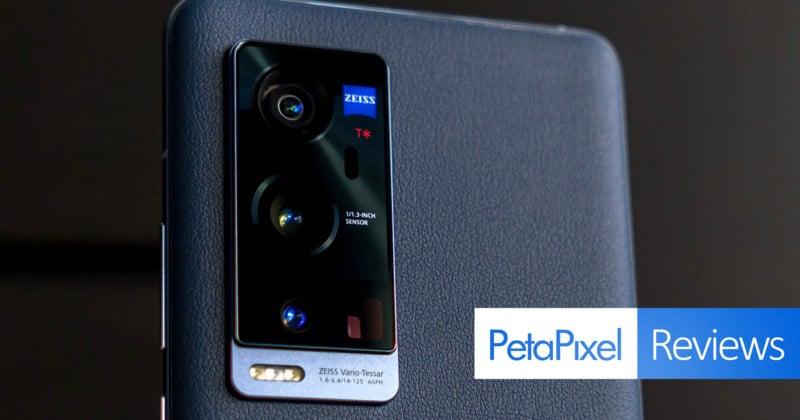
For Vivo’s part, it throws out the word “professional” with confidence because — as mentioned — it partnered with Zeiss to co-engineer the imaging system in the X60 devices. The official word is that Zeiss primarily helped with lens design and system integration. This is why the phones have T* Coating and Tessar certification, and why Zeiss’s input is supposed to be evident in both the hardware and software.

I tested this out with the best of the bunch in the X60 Pro+, though some of the performance and results also apply to the X60 Pro.

Design and Build

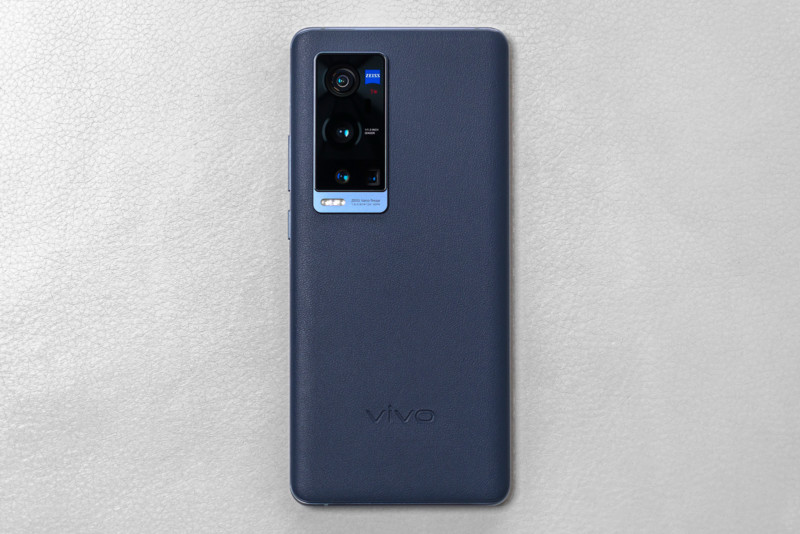
This was my first time reviewing a Vivo device, so I went in with a clean slate of expectations, inside and out. From a design standpoint, it’s hard not to like the X60 Pro+. I last saw a (vegan) leather back on a phone years ago, and while its longevity may be in question after some wear and tear, the style certainly worked for me. Beyond that, it’s the camera array that stands out with four lenses and a prominent Zeiss logo visible at the top.

While I’ve never been fond of curved displays, even if they are somewhat subtle like the one here, the 6.56-inch Super AMOLED is objectively nice to look at. Its modest 2376 x 1080 resolution is something of a surprise for a flagship at this point, but it’s one of the corners Vivo cut to accommodate the 120Hz refresh rate. By default, it’s set to “Smart Switch,” which dynamically switches between 120Hz and 60Hz, and the company clearly spells out that it’s partly to preserve battery life.

There’s no wireless charging, though there is fast 55W wired charging — something I couldn’t test because my review unit came with a European charger. Under the hood, the phone runs on a Snapdragon 888 processor (the X60 Pro runs on the Snapdragon 870), and my unit had 12GB of RAM and 256GB of storage. There is an 8GB and 128GB variant as well. No memory card slot for storage expansion, either.

There is a unique “Extended RAM” feature that poaches 3GB of “idle” storage and allocates it to the existing RAM when the system requires it. It’s hard to know what would trigger it exactly, but the idea is to improve performance when multiple apps are running in the background. For context, the “+3GB RAM effect” would push this phone’s memory to 15GB under those circumstances.

Vivo’s plans to roll out the X60 series in North America are unclear. If the company does choose to, it would need to be a variant that supports 5G bands with local Sub-6 and mmWave support. As is, there’s virtually no compatibility, though 4G LTE should be fine.

Camera Features

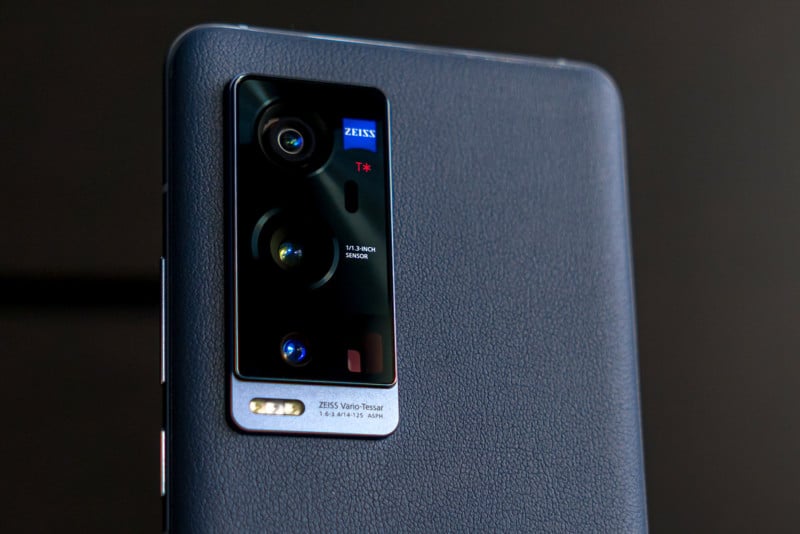
Zeiss’s presence here is hard to measure because Vivo doesn’t always specify the extent with which its input applies. What is known is that T* Coating on the main camera is designed to reduce reflections, stray light, and ghosting. It’s the same type of coating Zeiss applies to its camera lenses, though this is not a first for a smartphone. Sony’s Xperia 1 II and Xperia Pro have also used the same thing already.

Vivo went with a 50MP 1/1.3-inch Ultra-sensing Samsung ISOCELL GN1 sensor with an f/1.57 aperture that is also capable of shooting at 100MP in High-Resolution mode. This 23mm equivalent lens and sensor are unique to the Pro+, as the regular Pro uses a 48MP Sony IMX598 as its main sensor instead.

The Samsung image sensor is not the same as the one in the Galaxy S21 Ultra, but rather the S20 Ultra, so it is a bit older than the most recent GN2 sensor. If there is any drawback in that, the Zeiss collaboration and onboard camera software is supposed to pick up any slack.

Going with this sensor also meant Vivo had to put its Gimbal Camera in the 48MP ultra-wide camera, which is a 14mm equivalent with a 114-degree field of view. It’s the same Sony IMX598 sensor that makes up the primary lens on the X60 Pro.

Perhaps in a reflection of the markets it is strongest in, Vivo prioritized portraits by assigning a 32MP telephoto lens to that mode. It’s a 50mm equivalent (2x optical zoom) trying to emulate a prime lens, and with an f/2.1 aperture and 0.8 Micron pixels, it works best when lighting is at least decent. Portrait modes and beauty features are vogue in other markets, which also explains why this phone has a “Male friendly makeup” option in the settings that is toggled on by default.

Rounding out the array is the 8MP telephoto lens, a periscope camera with a 5x optical zoom that is a 125mm equivalent with a tighter f/3.4 aperture. The Super Macro mode has its own setting within the interface, though there is an interesting discrepancy. While the Pro+ can get as close as 3.5cm, the regular Pro beats it by getting down to 2.5cm.

Software Features

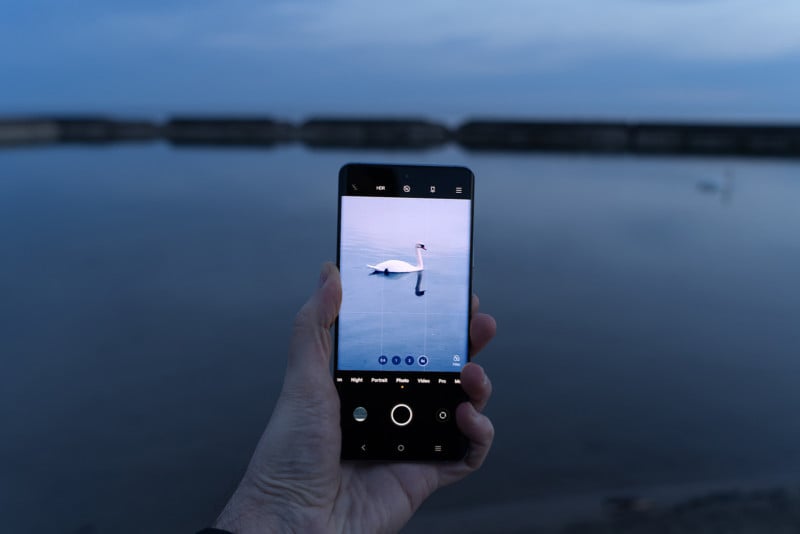
Putting the hardware aside, there’s a lot happening with the software here. This is one of the busiest camera interfaces I’ve seen — which is not a bad thing — but does include a number of specialized choices. For instance, there are modes like Supermoon, Astro Mode, Pro Sports, Slow shutter, and Double exposure. These software-driven options may use one or more lenses to pull them off. And those are all under the “More” section. Never mind the seven (if you count Super Macro) that are laid out on the main camera screen.

It’s unclear just how much Zeiss had to do with any of that. Joint statements from both brands largely point to physical adjustments and certifications, with nary a mention of the influence over software. One exception to that includes using Zeiss’ Biotar portrait style for the Portrait mode. It aims to reproduce the classic bokeh effect, though makes it more selective, particularly after the fact under that mode.

Vivo also includes an AI Scene Optimization feature that adjusts settings based on the scene or subject, but I turned it off straightaway. When you’re presenting your device as a mobile photography arsenal, that kind of input wouldn’t be necessary for competent shooters. And since HDR figures so prominently — also as a selective option — there is plenty at work to try making photos look better.

It does run on Android 11, yet it’s Vivo’s Funtouch 11 overlay that makes more of a visual impression. The company’s newer OriginOS is only in China, so I have no basis of comparison, but in any case, the overall software experience isn’t bad. I did appreciate that my review unit didn’t have the kind of bloatware others have noted in other markets. That helped at least close the gap between the Funtouch overlay and stock Android. Still, compared to OnePlus’ OxygenOS, Vivo leaves plenty of room for improvement.

Image Quality

Main camera

As the biggest differentiator for the Pro+, the main camera is the key to the phone’s ability to shoot good images. It does better when conditions provide some color to the scene, and I noticed the contrast between photos with sunlight or vibrant hues, and those shot in overcast days or more neutral scenery. For the most part, though, photos come out looking really good, even upon closer inspection.

Like so many other phones these days, there is a tendency to overexpose when first setting focus, but adjusting the slider often leads to better results. There was no oversaturation nor overzealous sharpening to ruin the composition. I can’t say I was expecting that kind of restraint, though when a company promotes the photography prowess of its flagship phone, less is more sometimes.

And that’s kind of what’s happening with this camera because, as much as Vivo calls it a 50MP shooter, the standard Photo mode captures at 12.5MP. It shoots at 50MP in High-Resolution mode, using pixel binning to also support 100MP output, should you want to do that. It would’ve made more sense to integrate these things into Photo mode, with the option to choose from 12.5MP, 50MP, or 100MP.

The Zeiss T* coating did seem to have an effect on reducing glare, including lens flare when shooting towards light sources, but otherwise, I don’t know that it made a considerable difference in output.

Ultra-wide

The large ultra-wide camera has a lot going for it, except the most prominent elements are more impactful for video than for stills. Vivo’s Gimbal Stabilization 2.0 doesn’t do anything for photos, which is generally fine because the wider angle is less susceptible to movement for snapping images anyway.

What matters more, at least to me, is that there’s limited distortion. While not bad in that regard, there’s room for improvement, as I did note some degradation towards the edges. There is a fair bit of “lean” for objects close to the edges as well, but not enough to ruin the photos I took. Image quality was good, albeit with more muted color unless there was something really vibrant in the scene.

Telephoto and Hybrid Zoom

The 8MP telephoto periscope lens isn’t bad for something with a lower resolution that’s optically fixed at 5x zoom. It’s just that the limitations become obvious upon closer inspection. Vivo must be using some kind of sharpening to these photos to mask imperfections because they generally look more processed than others do.

With an f/3.4 aperture, it’s really handicapped in low-light situations, yet does come into play with some other modes that require multiple lenses, which I’ll get into later.

Vivo touts the 60x hybrid zoom, even though it really shouldn’t because it’s awful in just about every respect, standing no chance of producing anything remotely close to a usable image.

And unlike competitors, it offers no shortcuts to other hybrid focal lengths, so if you wanted to shoot at, say, 10x or 20x, you’d have to pinch-to-zoom to get there.

Portrait mode

The bokeh effect attached to the 32MP sensor and lens is interesting in that it supposedly harkens back to Zeiss’ heritage in optics. To whatever extent that’s actually true, it’s obvious Vivo’s software is doing the legwork here. You have the choice between 1x, 2x and 5x in Portrait mode, but 2x is the default because that’s the 50mm equivalent.

Once you take a shot, you don’t commit to the exact effect before, but rather after you’ve taken it. When I previewed portrait shots, I could drag the focal point around and adjust the level of bokeh with a slider that emulates F-stops along the way. The range is between f/0.95-16, with the background shifting accordingly. It always defaults to f/2.0 to start, which may be too creamy for the scene, whereas f/0.95 is on another level. The good news is you don’t have to commit to a bokeh level and stick with it. If you change your mind after, you can resave it again.

I’m often wary of modes like this, only to have come away impressed at the results here. In good conditions, especially outdoors, the phone produces images that are objectively nice. Despite some skin smoothening going on, skin texture is still visible, so it’s not done in a silly way.

Pro Mode

Off the bat, I appreciated Vivo at least trying to educate users on Pro features and terminology just by tapping the information icon in the interface. I could also appreciate that all four lenses were available to shoot within this mode, which isn’t always the case with other phones.

My one gripe is that the lens icons lay in really close proximity to the manual controls for exposure, ISO, shutter speed, white balance and autofocus. On several occasions, I accidentally picked a lens when I was trying to change ISO or shutter speed, leading to an annoying recalibration each time.

That aside, the mode shoots solid images, and while selecting RAW in the interface would make you think you’re solely capturing a RAW photo, it also saves a JPEG as well. Too bad Vivo didn’t think to include focus peaking, as that would’ve added to the overall composition. It’s a minor thing, and perhaps the company could add it through a software update in the future.

Night Mode

Where others talk a lot about night photography, Vivo is more understated. Its Night mode is okay, except there’s a lot of processing going on that leads to too much sharpening. HDR stacking combines multiple exposures to get an optimized image, like others do, only the results are highly contingent on available light.

Google and Huawei do it better, whereas Vivo is more in line with where OnePlus is currently. However, Vivo does offer something the others don’t, which is the ability to add some color variations to the composition. Under the mode, there’s a “Style” icon that brings up a menu of color balance filters. Select one and use the slider to adjust its intensity. For example, you have black & gold, green-orange, cyberpunk, and dark red, among others. I initially dismissed this as a gimmick — and it is, to some degree — yet was pleasantly surprised at how effective it could be.

In general, Night mode is somewhat autonomous in the sense that it also has an “extreme night” setting within it that kicks in whenever a scene is very dark. You can also shoot panoramic photos in this mode as well. Vivo adds Night separately in Video mode, making low-light photography and videography readily apparent throughout. It does need tweaking, though, and hopefully, Vivo improves it through software updates going forward.

Special Modes

With all the extras under the “More” section, the one that stuck out for me was Slow shutter. As its name implies, it emulates long-exposure photography that wouldn’t be possible to do manually on this device. Case in point, “Flow of traffic” captures light trails, and there are others that can capture fireworks, waterfalls, and more.

Along with the effect, you can also choose the exposure from as low as two seconds, and on up to 32 seconds. Fireworks switches to F-stops, since the idea is to freeze the bursts in action. Star Trails is really long exposure, starting at 30 minutes, all the way up to two hours, but to use that, you ideally need a darker sky to capture all the starry movements.

Supermoon was far better than I expected. It starts at 1x to combine the moon with a landscape scene, or you can zoom 10x, 30x, or 60x to get a closer take. In the former case, the main camera captures the landscape, while the telephoto camera shoots the moon. In the latter case while zooming, there’s a lot of software processing to make the image look detailed. The only caveat is that the moon needs to be unobstructed, or else the mode won’t recognize it. When I tried shooting it behind some tree branches, it never kicked in.

Double exposure is somewhat bizarre in that it combines the rear and front-cameras to overlay and blend them together. You can apply a couple of styles, along with a set of beauty features to smooth skin and whiten teeth. It’s an acquired taste, possibly yielding something useful in a rare circumstance.

Video Features

I didn’t go too in-depth in the video features, but they are pretty extensive. Video ignores the 5x telephoto lens and prioritizes the other three. It’s fine that 8K video is possible here, just that 4K at 30fps or 60fps is more versatile. Not without some limits, however. Turn HDR on and you’re limited to 30fps when shooting in 4K. The same is true if you turn on Super Night mode, which also won’t work at 60fps.

Movies is what Vivo calls a “Cinematic Master” feature that films in widescreen at a 2.35:1 aspect ratio, but the company oddly doesn’t include 24fps to the resolution options. To get that, you have to switch out of Video to Pro mode, tap the video icon, and select it from there. You don’t get the same aspect ratio, but at least you can control composition. Plus, you get focus peaking as an option, which you can’t do for still photos.

The Gimbal Stabilization 2.0 comes in under Video with the hand icon. Standard is the default, and you can go to Ultra if you need extra help, except you also get a little dip in quality that way. From my cursory testing while walking, both slowly and quickly, it’s an excellent feature, keeping footage steady throughout. Just unfortunate there’s no way to use it with Pro video (it does work with Movies).

Packed With Features That Need Time

I haven’t used too many smartphone cameras this feature-laden. It was like every time I launched the camera to shoot something, I discovered some new feature or option, and that’s why the interface requires time and patience due to how layered it is. Rather than stick most things into the settings menu, they’re available somewhere within the interface instead. That’s why it’s the kind of camera that you won’t fully understand until you take time to figure out where everything is, and how it works.

That can be a lot to take in for a novice, which is why this camera is overkill for anyone disinterested in learning to take better photos or video. Vivo is on to something with the full gamut available, somehow even making otherwise gimmicky modes look good. It just has to tweak certain things to make it even better. As for Zeiss, it needs to be clearer on exactly how it makes photos look better on the X60 series.

Are There Alternatives?

The X60 Pro matches almost everything the Pro+ does except for all the features related to the 50MP main and 8MP telephoto cameras. Zeiss was involved in developing the Pro’s camera array as well, though didn’t apply its T* Coating to its lenses.

As for others, the OnePlus 9 Pro is pretty extensive in its own right, though if you’re looking for a camera offering several modes, the Samsung Galaxy S21 Ultra is one of them. While far less versatile from a feature set point of view, the Google Pixel 5 is still an option, as would be the iPhone 12 Pro Max, which is Apple’s most varied camera array to date.

Should You Buy It?

Yes, so long as you’re okay with the fact 5G connectivity isn’t going to happen stateside. This is a phone built to connect at the highest levels elsewhere, but the camera can work anywhere, so it’s a worthwhile choice if mobile photography is of paramount importance.