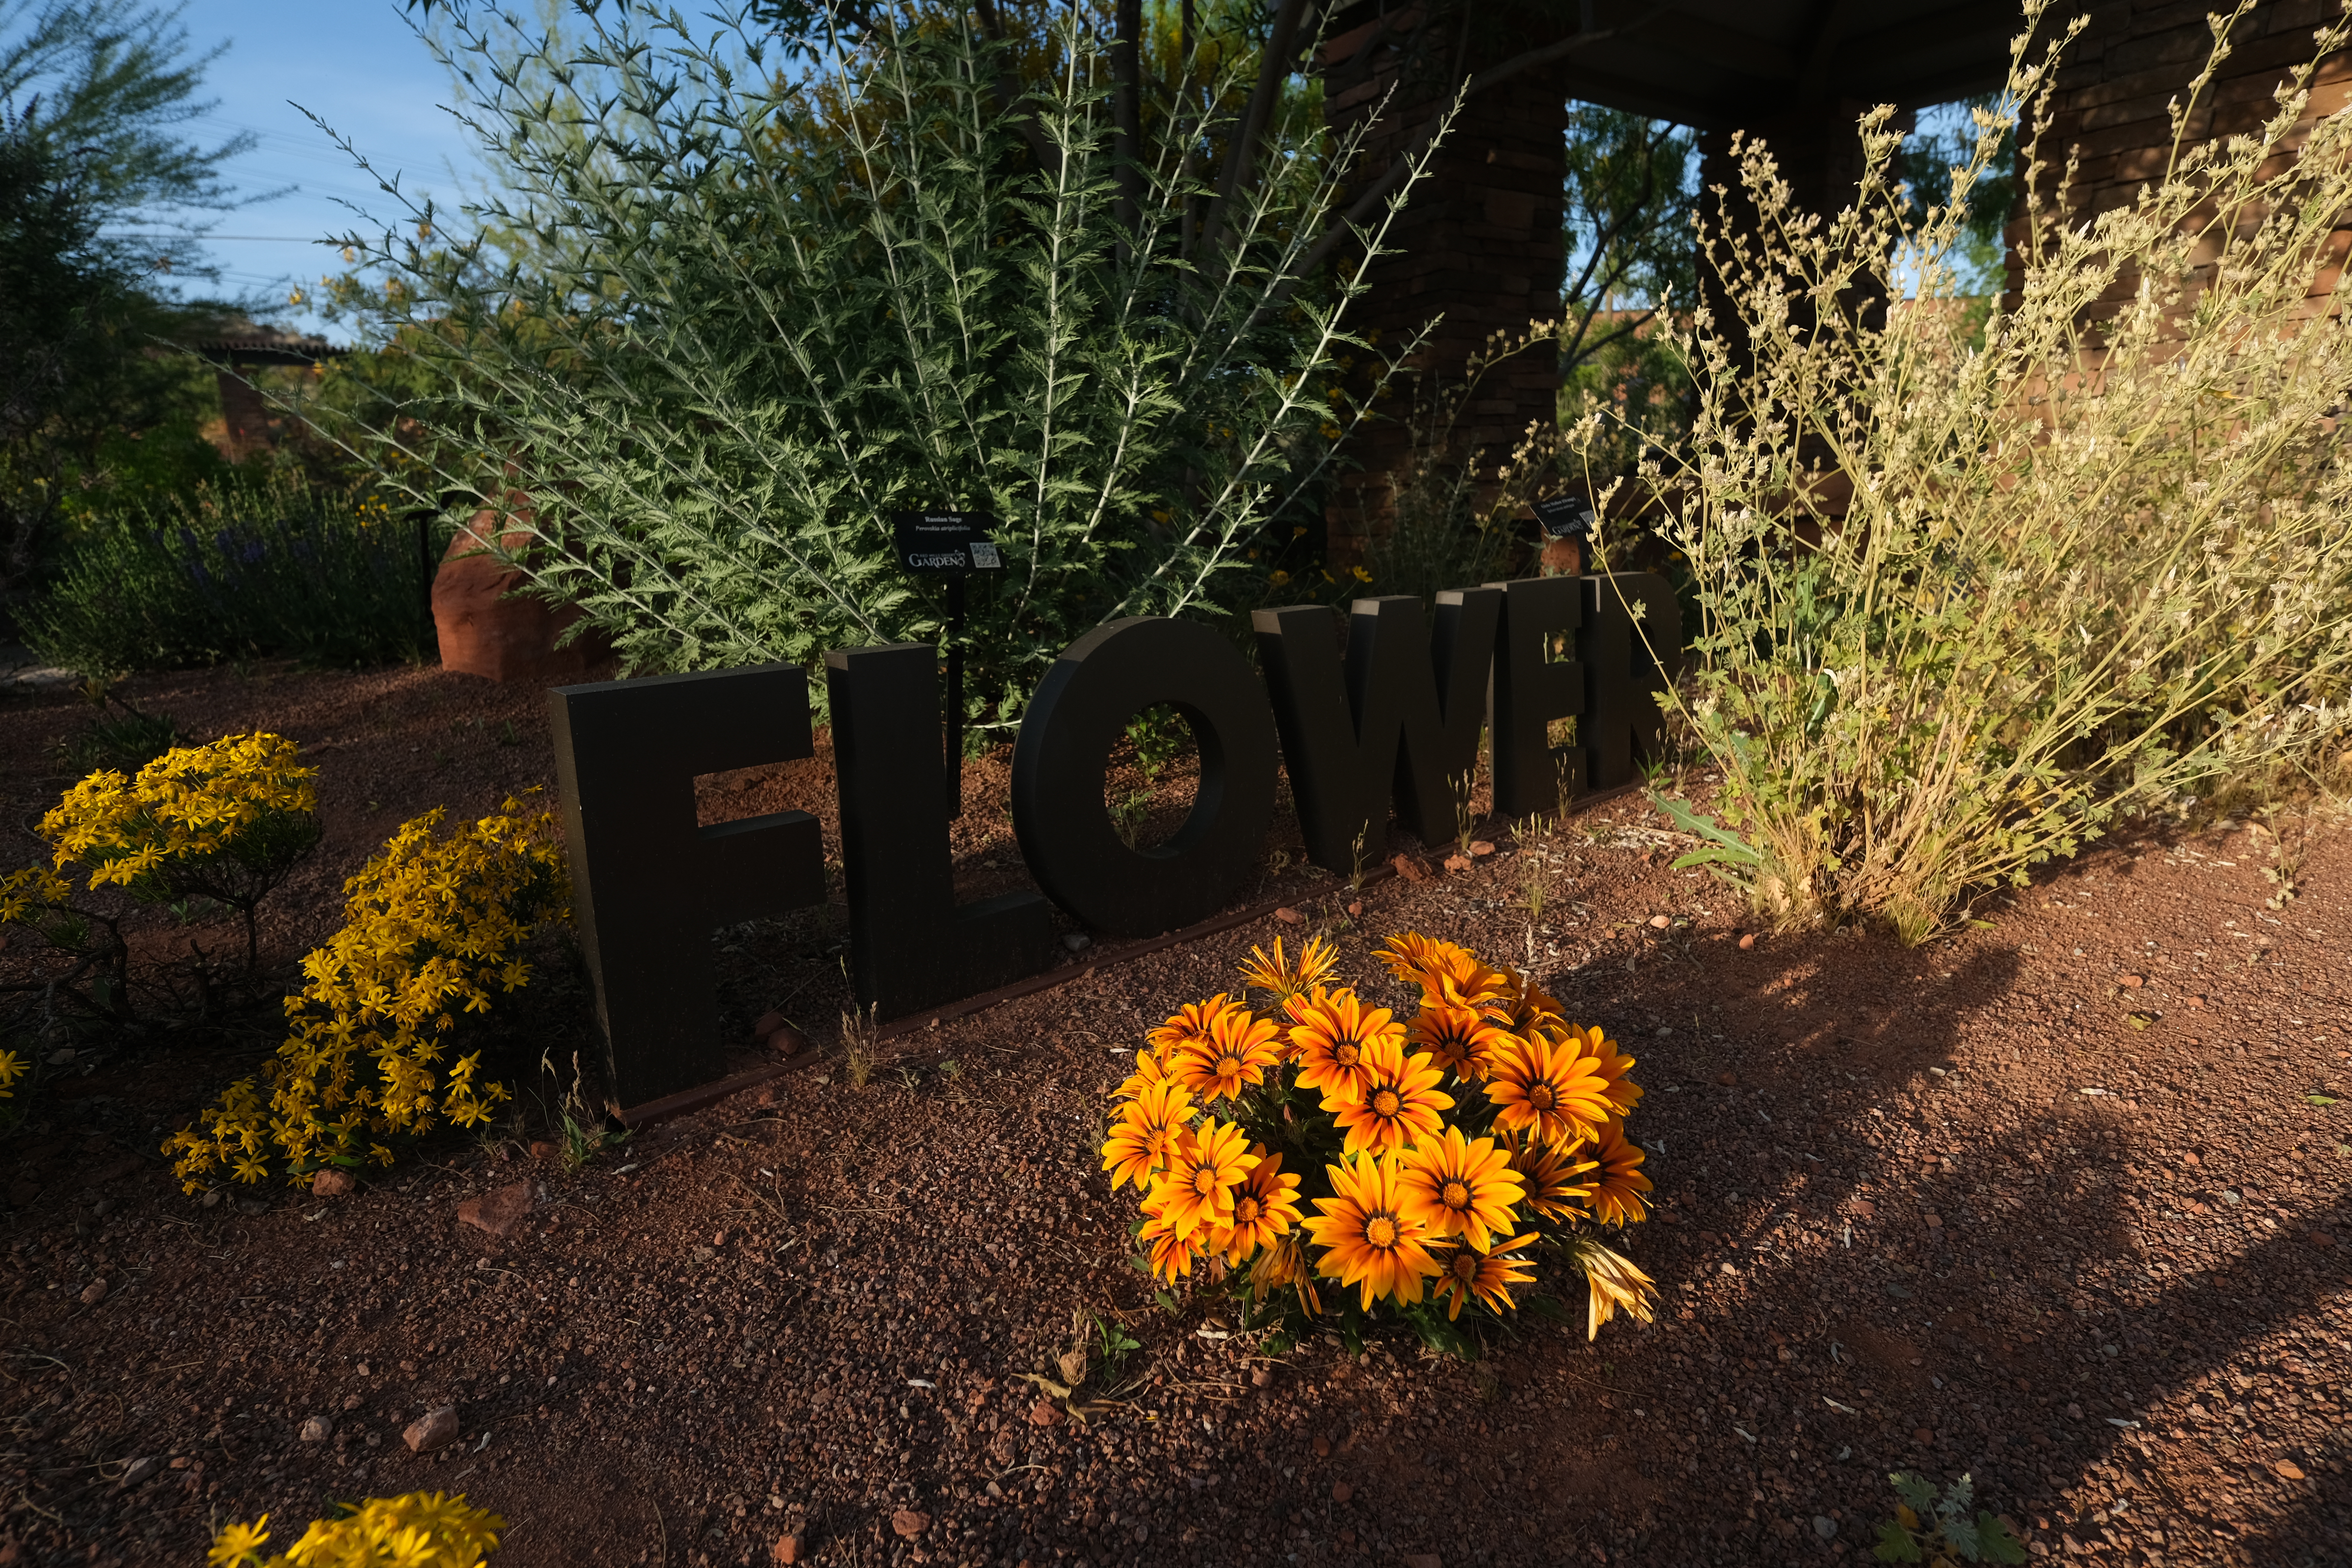
In this video and article, we’re going to show you how to spice up an ordinary portrait using off-camera flash to simulate window light photography.
We’ll use the CAMP framework (Composition, Ambient Exposure, Modify or Add Light, Pose & Photograph) to outline the steps we took to compose, light, and capture the final image.
Step 1. Compose Your Shot
Our main goal here is to use the space next to the window so that we can later add an external flash and simulate window light photography for the purpose of adding visual interest to the portrait. We placed the subject to the right of the frame and far enough away from the window to create plenty of negative space. The background wall in this particular setup featured several holes and other distracting elements, but because it’s a big solid wall, removing the distractions in Photoshop will be easy.
Step 2. Dial in Your Ambient Exposure
50mm, 1/2000, f/1.2, ISO 200
After composing our frame, we need to dial in our ambient exposure. In our baseline image (see above), we adjusted our exposure settings to maximize dynamic range for a dramatic portrait, leaning toward the left side of the histogram because we’re going to add off-camera flash.
Using a 4-stop ND filter directly in front of the lens eliminated the need for high speed sync
However, the high shutter speed (1/2000) requires the flash to use high-speed sync in order to fire, so we placed a 4-stop ND filter directly over the lens. This allowed us to slow the shutter speed to 1/200 and eliminate the need for high-speed sync.
Step 3. Add Off-Camera Flash to Simulate Window Light Photography
We placed a Profoto B10 (250 watt seconds of power) about 15 feet up into the air on a light stand and pointed it through the window toward our subject. We used a zoom dish on the flash to minimize light spill and we also added a CTO gel to the flash to add a natural warmth to the light coming through the window.
Step 4. Capture the Photo
Whenever we’re shooting with hard light, we need to pose our subject for that light. Direct your subject into a pose that allows highlights and shadows to create ideal lighting patterns (such as Rembrandt, used here) and capture the shot. By making micro-adjustments to the pose (as we did in this series with hands in the pockets, playing with the hat, etc.), you can further maximize your efficiency and end up with several usable images from a single scene.
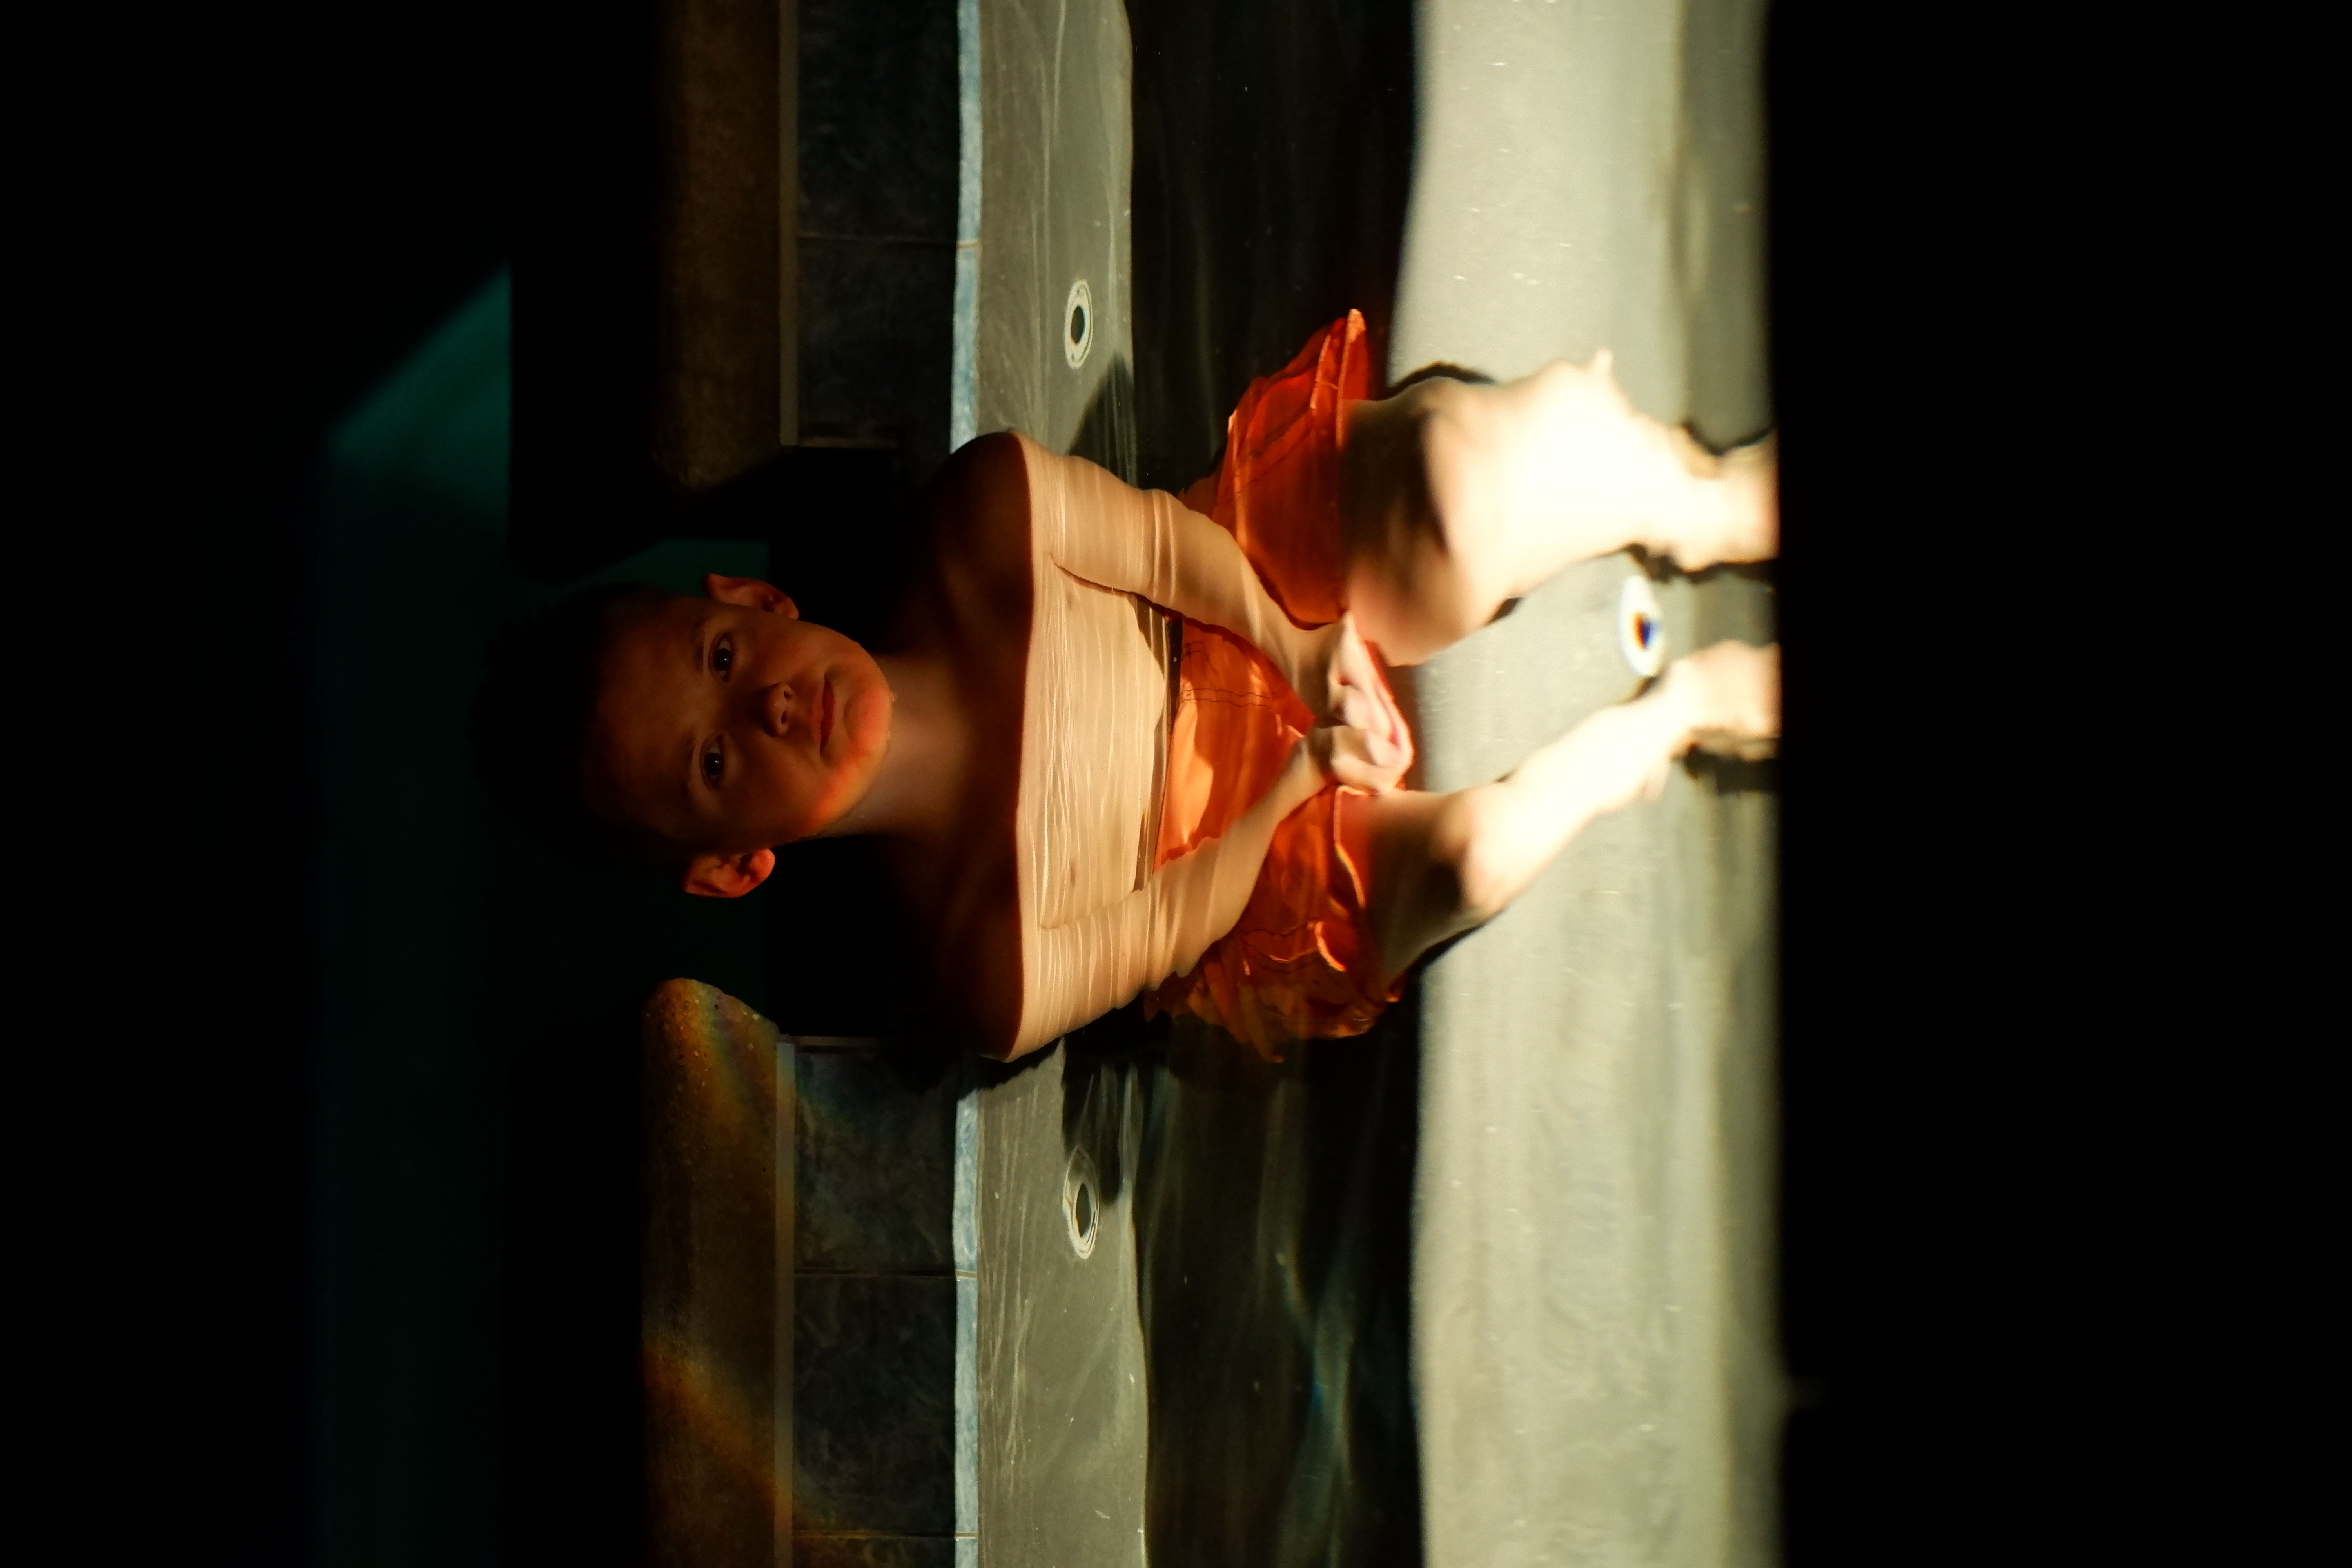
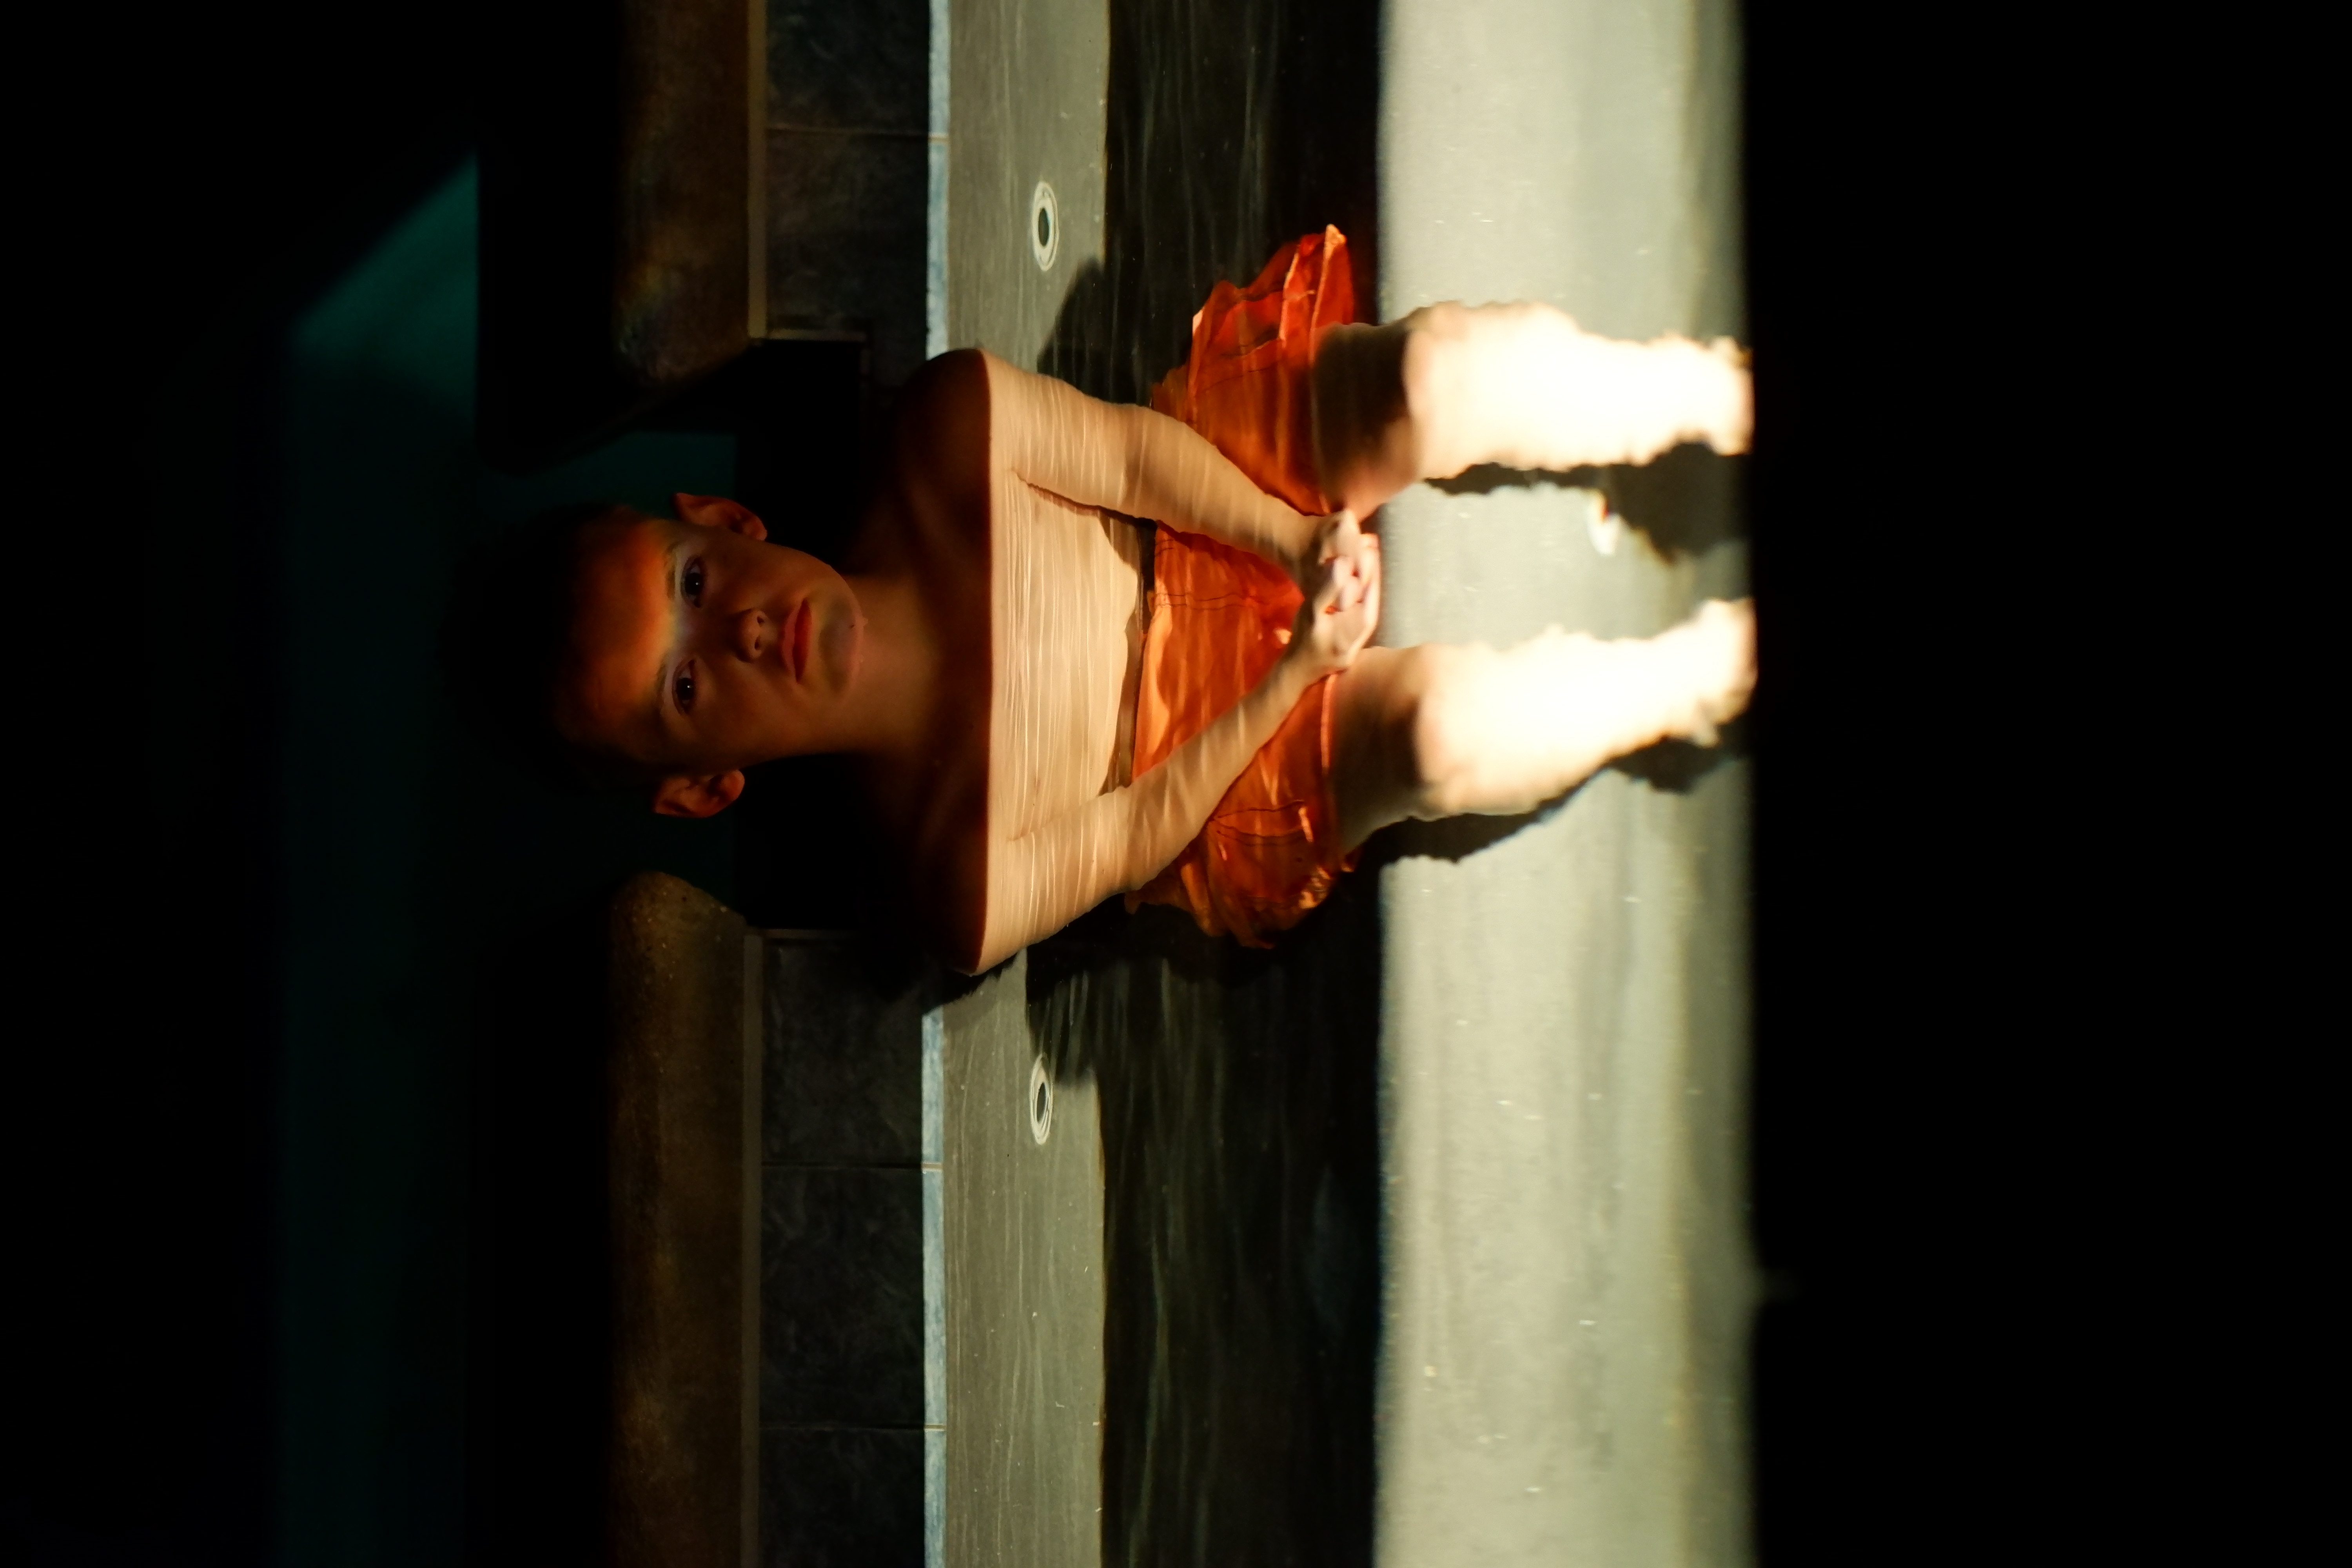
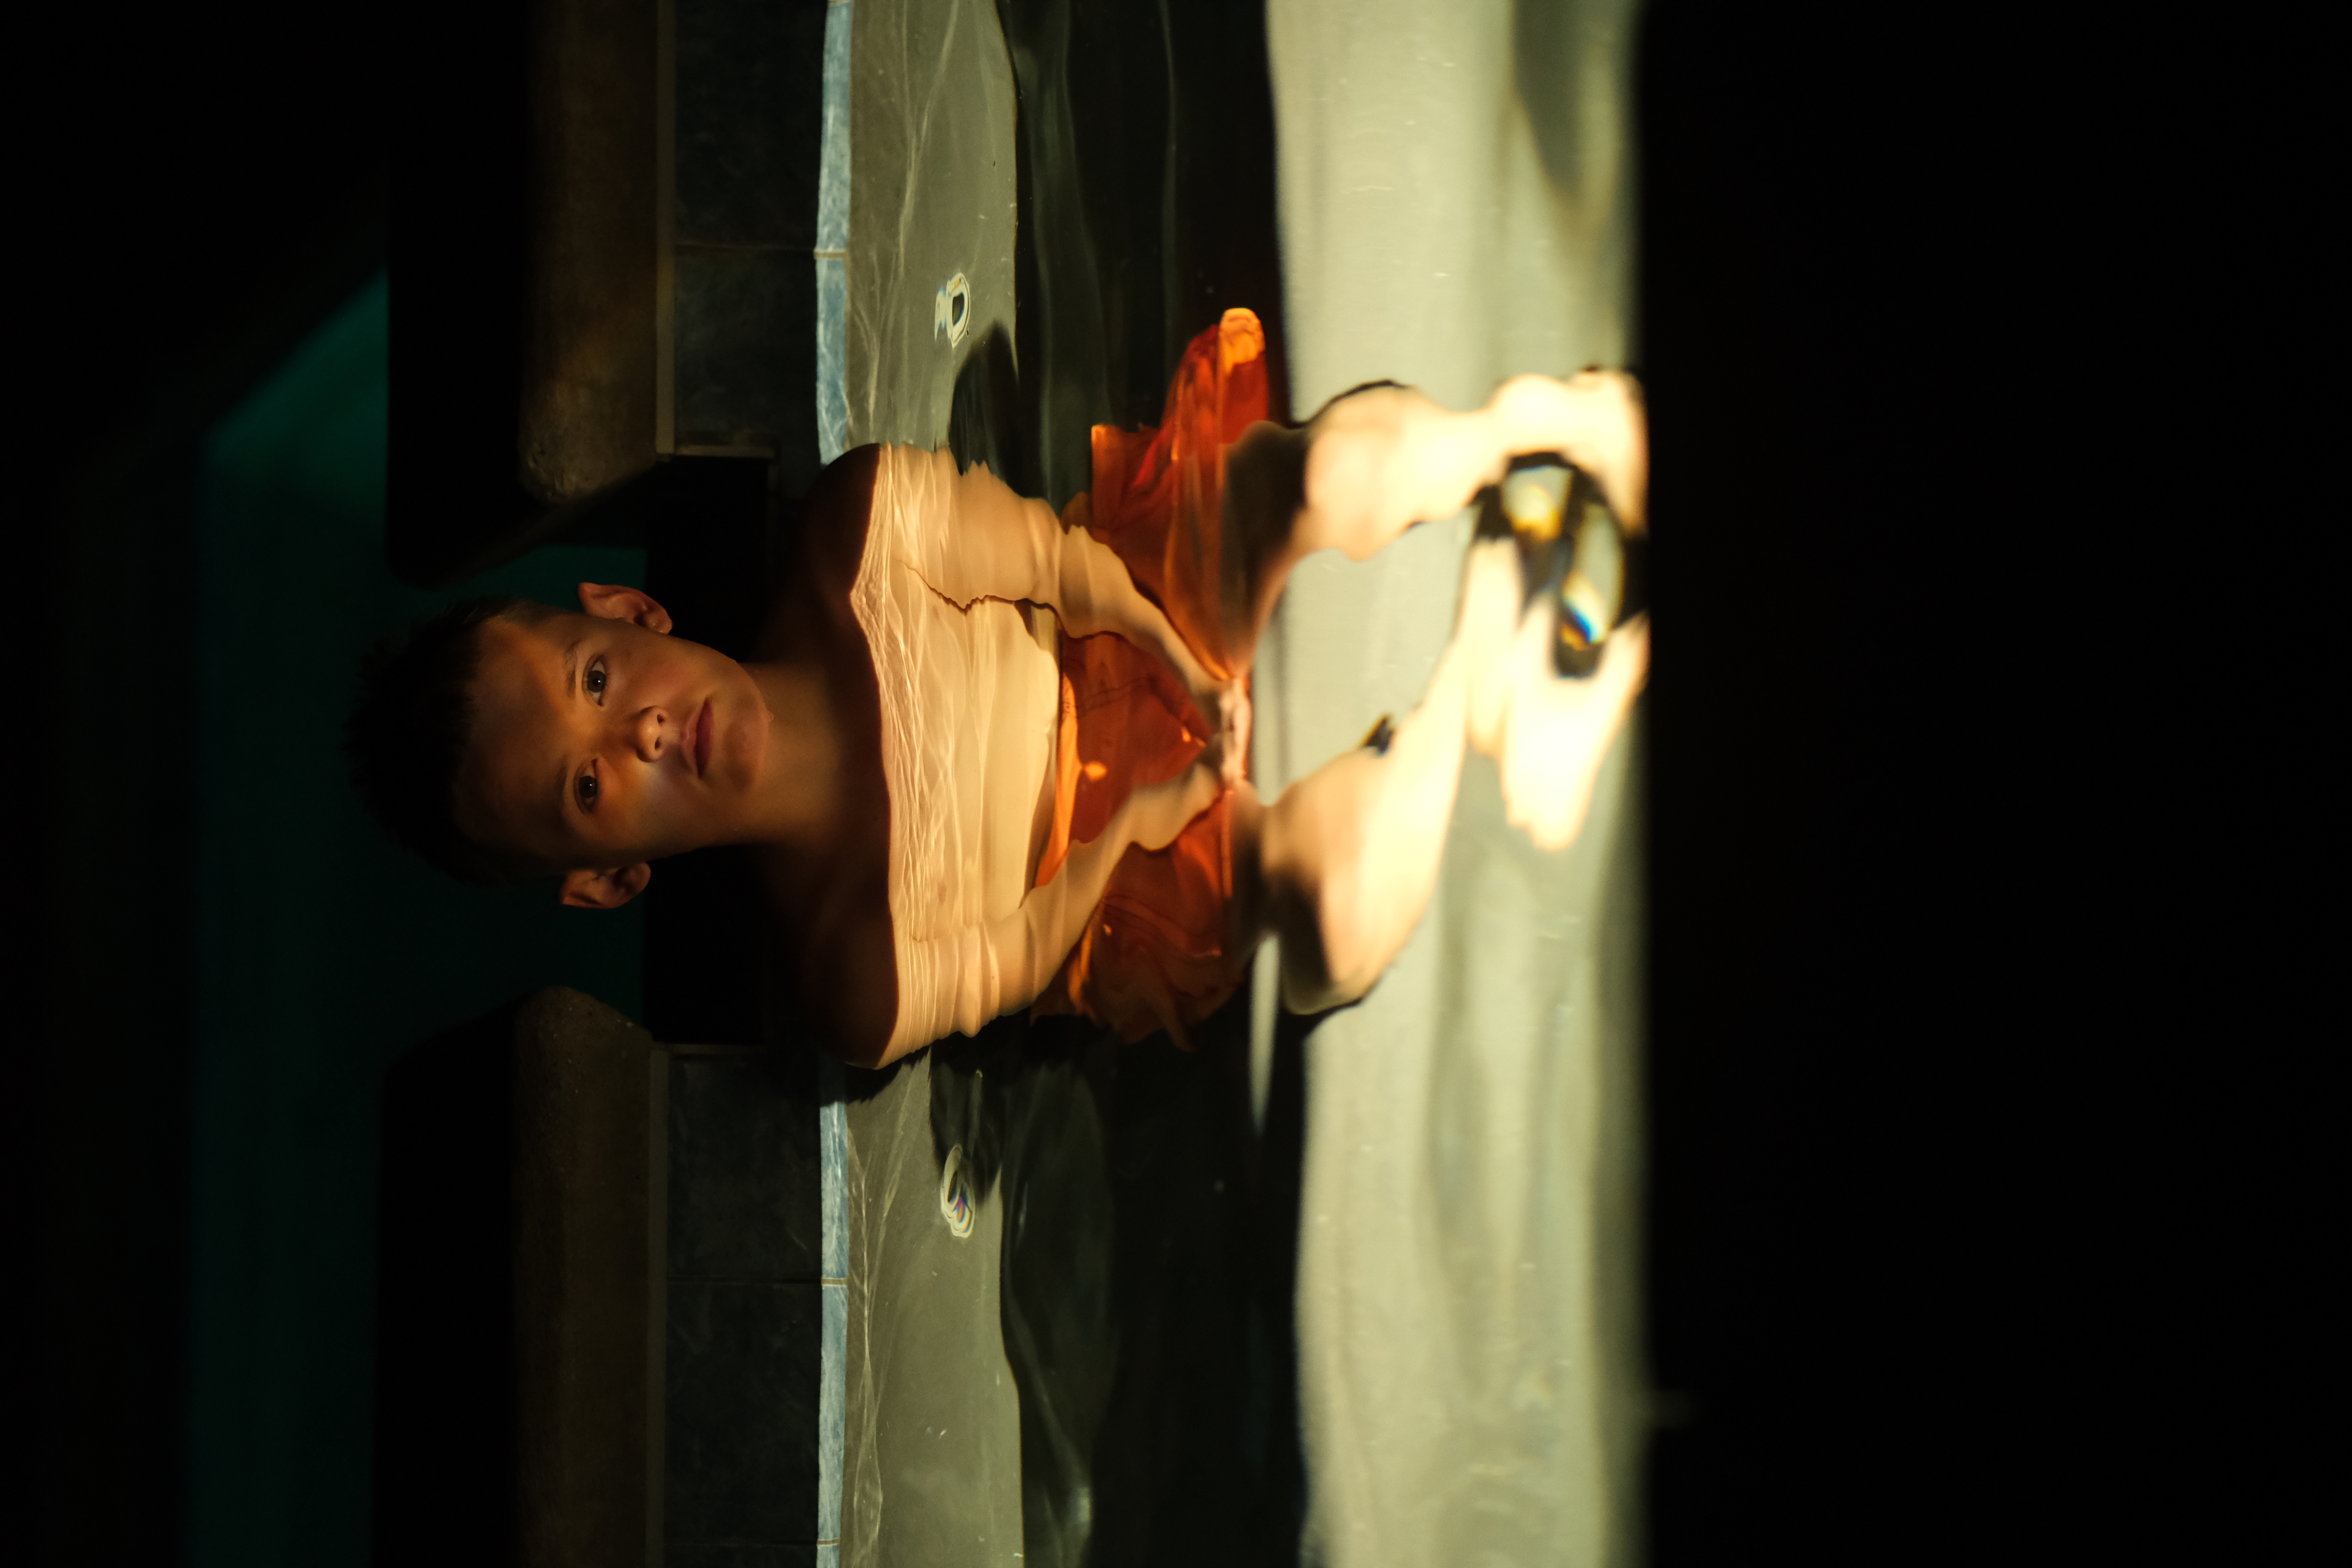
Before and After
BeforeAfter
The photo without the simulated window light is fine, but the added light ups the visual interest and makes for a more compelling portrait. We edited the final image using the “Hard Light” preset from Visual Flow Presets‘ new Crush Pack.
We hope you enjoyed this video and lesson on how to simulate window light with off-camera flash.
About the author: Pye Jirsa is a wedding photographer based in Southern California and the co-founder of SLR Lounge. The opinions expressed in this article are solely those of the author. You can find more of Jirsa’s work here. This article was also published here.
Any event photographer gets tons of requests from people asking for specific photos from an event. Sometimes they will acquiesce, but often not. Don’t nag them if they don’t get back to you or say no. Here’s why.
#1. Getting a photo off a camera is not like getting a photo off your phone.
I often take as many as 2,500 photos in a night shooting a show, and only 2-4% of those will ever see daylight. The process of trimming the 96%+ of rejects is called “culling” and it consumes a significant portion of the post-processing time.
Even if your photo made it past culling, it’s not as simple of just sending it over. What we have now are 40MB RAW files. A RAW file is the data captured by the camera’s light sensor, which includes information your eyes can’t see. These files cannot be used in any social media app or opened by anything other than software built to do so, such as Photoshop or Lightroom. Photographers shoot in RAW to give themselves more options in post-production, such as bringing out details from shadows without creating artifacts. These need to be edited (which is BIG) and then converted to JPEG before they become anything that can be used by normal people.
Then there’s resizing, watermarking, uploading, and delivering. Every photographer who deals with any sort of volume has refined a workflow that allows them to get from a memory card full of RAWs to a client-deliverable album in as few hours or days as possible. Asking for specific photos is asking them to take time to go outside the workflow they’ve built to keep themselves sane.
#2. You are not the client.
Attendees often mistakenly think event photographers are there for them. I definitely want to make all the guests happy and create photos of them that they’re psyched about, but ultimately I’m working for a client to create marketing material. My first and foremost effort is to serve the client, not the guests. After all, the clients are the ones who are paying for my time and talent.
#3. The photographer doesn’t want to spread work that didn’t make the cut.
At a certain point, photographers are hired for their style instead of just their ability to use the equipment. If a photo didn’t make the final deliverable, it probably didn’t fit the photographer’s style or failed to attain the degree of image quality (composition, focus, exposure) that the photographer holds themself to. Asking for that photo is asking for them to make public work that they don’t want to be associated with in a profession that is built on reputation.
TL;DR
Asking a photographer for photos you didn’t hire them for is no small ask. For the photographer, it involves spending time in post-production, serving someone who didn’t pay them, and doing something they’re probably uncomfortable with artistically. I’m not saying don’t ask. I’m saying if you ask, know that you are asking a lot.
About the author: Andrew MacRobert is a nightlight and lifestyle photographer based in Boston, Massachusetts. The opinions expressed in this article are solely those of the author. You can find more of MacRobert’s work on his website, Facebook, Twitter, and Instagram. This article was also published here.
One of the world’s leading colorists of historic photos fears she will be banned permanently from Facebook and Instagram after multiple suspensions of her accounts.
Russian photo colorist Olga Shirnina has stunning new work ready to post for her more than 45,000 followers on social media but is unwilling to share three new images on Facebook and Instagram because, as she told RFE/RL, “I would be [suspended] again for sure.”
An image colorized by Olga Shirnina that was finished on May 26. The photo shows a wreath-laying ceremony in Warsaw in 1939, several months before Nazi Germany invaded Poland. This is one of three images Shirnina says would almost certainly result in a suspension of her account if she were to post it to Facebook.Olga Shirnina. Courtesy photo.
Shirnina, who works under the name Klimbim, is a professional German-Russian translator and considered one of the best in the world at using Photoshop to transform historic black-and-white images into color.
The Moscow-based translator and history enthusiast says she spends hours on her computer researching, then adding vibrance to monochrome historic images “purely for pleasure.” Shirnina has been profiled in leading news and art websites around the world and labels her work free for anyone to use not-for-profit. Photos in her colorized collection are a mixture of daily life, portraits, and historic photojournalism from around the world. None of her captions include political commentary.
A 1916 image of Russian Tsar Nicholas II colorized by Shirnina.
In September 2019, Shirnina received her first notification from Instagram that an image she colorized of senior Nazi leaders had “violated community guidelines” and that her account could be deleted if she posted similar content in the future.
A notification from Instagram that Shirnina had violated Instagram’s rules on “dangerous organizations.”The image that was pulled from Instagram in September 2019 showing Heinrich Himmler (left) meeting with German Ambassador to Poland Hans-Adolf von Moltke in 1939.
In the following months, several more of Shirnina’s colorized photographs were removed from both Facebook and Instagram, which is owned by Facebook.
The situation escalated when Shirnina’s Facebook account was suspended after she posted the image below of two Nazi soldiers during a battle in Ukraine. No Nazi insignia is visible in the photo, suggesting the image may have been flagged by a person rather than through automation. Shirnina was again warned she had broken Facebook rules on dangerous organizations. It would prove the first and last time she says an appeal was successful.
Two Nazi soldiers in Kharkhiv, Ukraine, in 1943
Facebook’s policy on Dangerous Individuals And Organizations states:
In an effort to prevent and disrupt real-world harm, we do not allow any organizations or individuals that proclaim a violent mission or are engaged in violence to have a presence on Facebook. This includes organizations or individuals involved in the following:
Terrorist activity
Organized hate
Mass murder (including attempts) or multiple murder
Human trafficking
Organized violence or criminal activity
We also remove content that expresses support or praise for groups, leaders, or individuals involved in these activities.
Then in early May, Shirnina’s Facebook account was suspended for three days — this time for posting a colorized version of Evgenei Khaldei’s iconic photo of Soviet soldiers raising their flag above the Reichstag in Berlin in 1945. Her appeal against the decision was rejected and she was able to use her account with more than 20,000 followers only after waiting three days, then sending a scan of her driver’s license, which Facebook requested to confirm her identity.
Shirnina’s colorized version of the iconic photo of Soviet soldiers atop Berlin’s Reichstag in 1945.The notification Shirnina received that her account had been suspended for posting the Reichstag image.
Shirnina says she has been “puzzled” by the apparent inconsistency of Facebook’s changing rules and says it remains unclear which images could trigger a permanent ban. “I work with real historical photos and they can’t be corrected!”
Several images of Soviet leaders responsible for the deaths of millions of people — as well as photos with Soviet symbols clearly visible — have been published without problem on her pages.
An image of Vladimir Lenin that was published on Shirnina’s Facebook and Instagram accounts — without problem.Soviet leaders Josef Stalin, Mikhail Kalinin (wearing glasses), Kliment Voroshilov and Lazar Kaganovich (standing, left to right) in 1930. Among other acts of political terror, all four men were behind the 1940 execution of some 22,000 of Poland’s top military officers, policemen, and academics seen as likely to resist Soviet communist rule in the Katyn massacre. Shirnina says this photo was also posted without problem on Facebook and Instagram.
We requested clarification from Facebook’s press department about which historic images represented a violation of their community guidelines on May 28 but did not immediately receive a response.
About the author: Amos Chapple is a New Zealand born, Europe-based photographer and writer whose work has been published in most of the world’s major news titles. You can find more of his work on his website, Facebook, and Instagram. This article was also published at RFE/RL.
My name is Mike Keesling, and I have what I think is an interesting perspective on image creation and I wanted to share it with you.
I grew up in a creative environment. My parents were both artists. Our house was the San Fernando Valley hub of the counterculture in the ’60s and ’70s. My father did light shows for Tina Turner, The Who, Pink Floyd to name a few. Busses full of hippies, painted on the outside, collaged in the inside would stop off at irregular intervals, unload tanks of nitrous oxide, pile into the pool, do their laundry, load up their tanks again, then depart for points unknown.
These were interesting times. The “man” was stifling your creativity, holding you back, keeping you down. And thus, I pretty much had free reign to live my life as I chose. What I call “overly permissive parents.” When I was four, my father taught me how to use all of his tools. If I could hold it, I could use it. Electric drill, soldering iron, screwdrivers, jigsaw, you name it. Other kids had Lego; Lego held me back.
My father had a model train store to pay the bills. I hung out there a lot. At the time, Industrial Light and Magic was not too far away, and the same was true of every special effects place and model shop in the motion picture industry. I was mentored by special effects designers, model builders, and Imagineers. I learned better ways to build things. I learned electronics and animatronics.
And I read. We had an encyclopedia set, Time Life books, and I had a bicycle and a library card. When I hit kindergarten, I was reading at the 4th-grade level, when I left elementary school I read at the college level. I read on every subject that let me advance my craft. Electronics and some chemistry mostly.
My first renaissance was when I was eight. My Aunt gave me an old Brownie camera. I shot and processed my own film in my closet. I made a terrible enlarger out of a light bulb, foil, and pinhole. I made ugly prints for a time, but I got distracted by a book, Lenz’s bomb and explosives disposal guide. I will leave it at that…
My second renaissance came when I was 13. I had learned the power of money and took what amounted to a full-time job at a place after school that was building a remote motion picture camera crane. I did mechanical design, machining, and some electronics. I got to put ideas into practice with real materials and tools.
I bought computers, synthesizers, printers, and plotters. Stuff to help me create and keep my mind happy. Common stuff by today’s standards, but in the early 80’s it was pretty esoteric and definitely fun. I got fascinated by 3D. I programmed 3D algorithms and output with my plotter using anaglyphic inks and glasses. I bought a laser and got into holography; I used the same laser to do light shows.
All this stuff was too much fun. My school work suffered. Where I cared, I excelled, but I got myself kicked out of junior high. High school was a serious challenge. I realized I was faltering so I checked myself out of my big high school and into a continuation. While there, I found my inner rebel. The board wanted to paint over a series of student murals, so I led a student strike. I presented our case to the board of education and preserved the murals. I was on local and national TV. I appeared on shows talking about kids, education, and dropping out.
I graduated high school, worked some odd jobs, met the woman of my dreams, and landed a job at a motion picture rental company called Clairmont Camera. Clairmont really represents the third renaissance for me in that it was the first place I got to apply myself fully.
Well, not at first.
I started there repairing and modifying motion picture lenses. Very technical, very detail-oriented. I learned about the exquisite precision required to build and maintain cameras and lenses and learned about how the soul of an image is captured through the lens.
I also learned at my first review that I “had too much imagination which, if left unchecked, could be a serious liability to the company.”
After two years of repairing lenses, I was transferred to the design department. I worked on a lot of different optical devices. Pinhole lenses, single element lenses, moving distortion filters, beam splitter rigs, motorize color wheels, and more.
One special day was really cool though. My boss, Denny Clairmont, was working with a customer on a rig that needed to reproduce the effect of explosions. The literal state of the art at the time was a motion base with eccentric weights on a motor that would shake the camera and lens. Denny wanted nicer electronics for the motor.
Instead, I asked why they weren’t doing it optically. I described the idea of a two-axis, variable angle wedge prism, and build a prototype with two optical flats, a trash bag, and some silicone glue the next day.
Long story short, The Image Shaker was born.
The Image Shaker
I designed the mechanics, electronics, fluids, and optics, and 6 months later we had a fleet of them. It was lighter than the shaking motion base, quiet, safe, and controllable with a variety of different modes. More importantly, it was a success. It was used on Saving Private Ryan, First Man, Star Trek Discovery, and hundreds of productions over the course of its ongoing life. If you have seen an action movie in the last 25 years, you have likely seen a shot that used it.
From Star Trek: Discovery
Another one of my successes was the Squishy Lens. The squishy lens was a thought exercise on the way home from work one day. The idea was “what if you had a flexible lens.” I ran the idea past Denny and he liked it. I bought some clear rubber and made some very primitive prototypes and showed him.
The Squishy Lens is actually a very complicated piece of equipment that tasked me on many fronts. Conceptually it is a hemispherical silicone lens compressed between two plates of polycarbonate. When uncompressed it acts as a powerful diopter. When compressed it acts like a window. The cool bit is when it is half compressed it acts like both. A window in the center of the image with a clear aspect and a diopter on the edges creating magnification and focus changes.
Three powerful motors actuated the front plate, allowing it to tilt and change the compression. A metal framework with holders for flags to block stray light, a bellows and air filtering to allow the thing to actuate and stay clean, finger guards to keep digits out of moving bits and an electronics and software to drive it all.
The Squishy Lens
Though not as ubiquitous as the image shaker, it has been used extensively in movies like Minority Report, X-Men, and most recently you saw it in use on Picard.
Dr. X in Cerebro after Mystique sabotages it. Still frame from X-Men (2000) by Marvel Entertainment Group.Minority Report opening sequence. Still frame from Minority Report (2002) by 20th Century Fox.
I am honored to have been awarded an Academy Award for the Image Shaker, an Academy Award nomination for the Squishy Lens, and an Emmy for my work in the field that included both of these inventions. A fun side note is my sister, Brooke, also has an Academy Award and Emmy.
When I left Clairmont Camera, the parting words to me were “we will really miss your imagination.” I am so thankful for them believing in me.
My fourth renaissance… That’s a lot of renaissances… When I left Clairmont Camera, it was to take a position at Panavision, another, larger, motion picture rental company. At Panavision, I didn’t do nearly as much cool stuff, but I did get to do a lot of important stuff. I developed a lot of metrology devices, I worked on some Academy Award-winning products and even did some work that affected the cosmetics of some of their product line.
I am most proud of a motion control system I designed that compensated for the motions of remote head camera cranes. It was unique in that it was real-time and dynamic. The cameraman could dial in the amount of contribution the motion control hardware made from no input at all to 100% assist. It did so during the shot, without any alarming behaviors.
I also learned how to work with teams of different engineers and bind them together. I learned about precision and aesthetics.
At this point, I closed a chapter of my life. I had spent 15 years at Clairmont Camera and Panavision combined. I worked with countless image creators and built tools to help them achieve their vision. I learned that science and engineering should support art but should never preclude it in an artistic field. Numbers are fine, but does it look pretty? Does it tell the story?
And for all this, I hadn’t really gotten back into creating my own images. I had been working really hard and raising a family.
I left Panavision to go work at a company called Applied Minds. Applied Minds is a sort of mash-up of engineering firm/architecture firm/production company and think tank.
Applied Minds represents my fifth renaissance. I started as an embedded systems engineer but leave as the director of electro-optics. I learned how to do things fast. Really fast. I have worked on a lot of things I can’t talk about and a few things I can. The coolest is a color night vision system I invented, but I also know about gigapixel imaging systems and imaging from ultraviolet through thermal.
During my 15 years at Applied Minds, I got to finally afford cameras and the time to play. I did a lot of project photography. I also bought a lot of cameras and took them apart just to play with them. I have played with cameras and point n shoots from all the significant brands. I have my favorites (Fuji) and my least favorites (Lytro).
While doing project photography I wore out the shutter on a Nikon D40 and put a lot of mileage on a Nikon D800 and Sony a7S II. I stopped counting at 250,000 shots. I looked at all my metadata and found that I shoot at one end of the zoom or the other 98% of the time. I stopped buying zooms for the most part.
But most importantly, I learned that the best camera is the one you have.
From an image creation standpoint, I still didn’t love my photography though. I was finally comfortable enough with it to look at other people’s work, however. Until then, I didn’t want to be tainted. I wanted my style to be mine and only mine, even if I found others’ works that I liked, I knew that my look was mine.
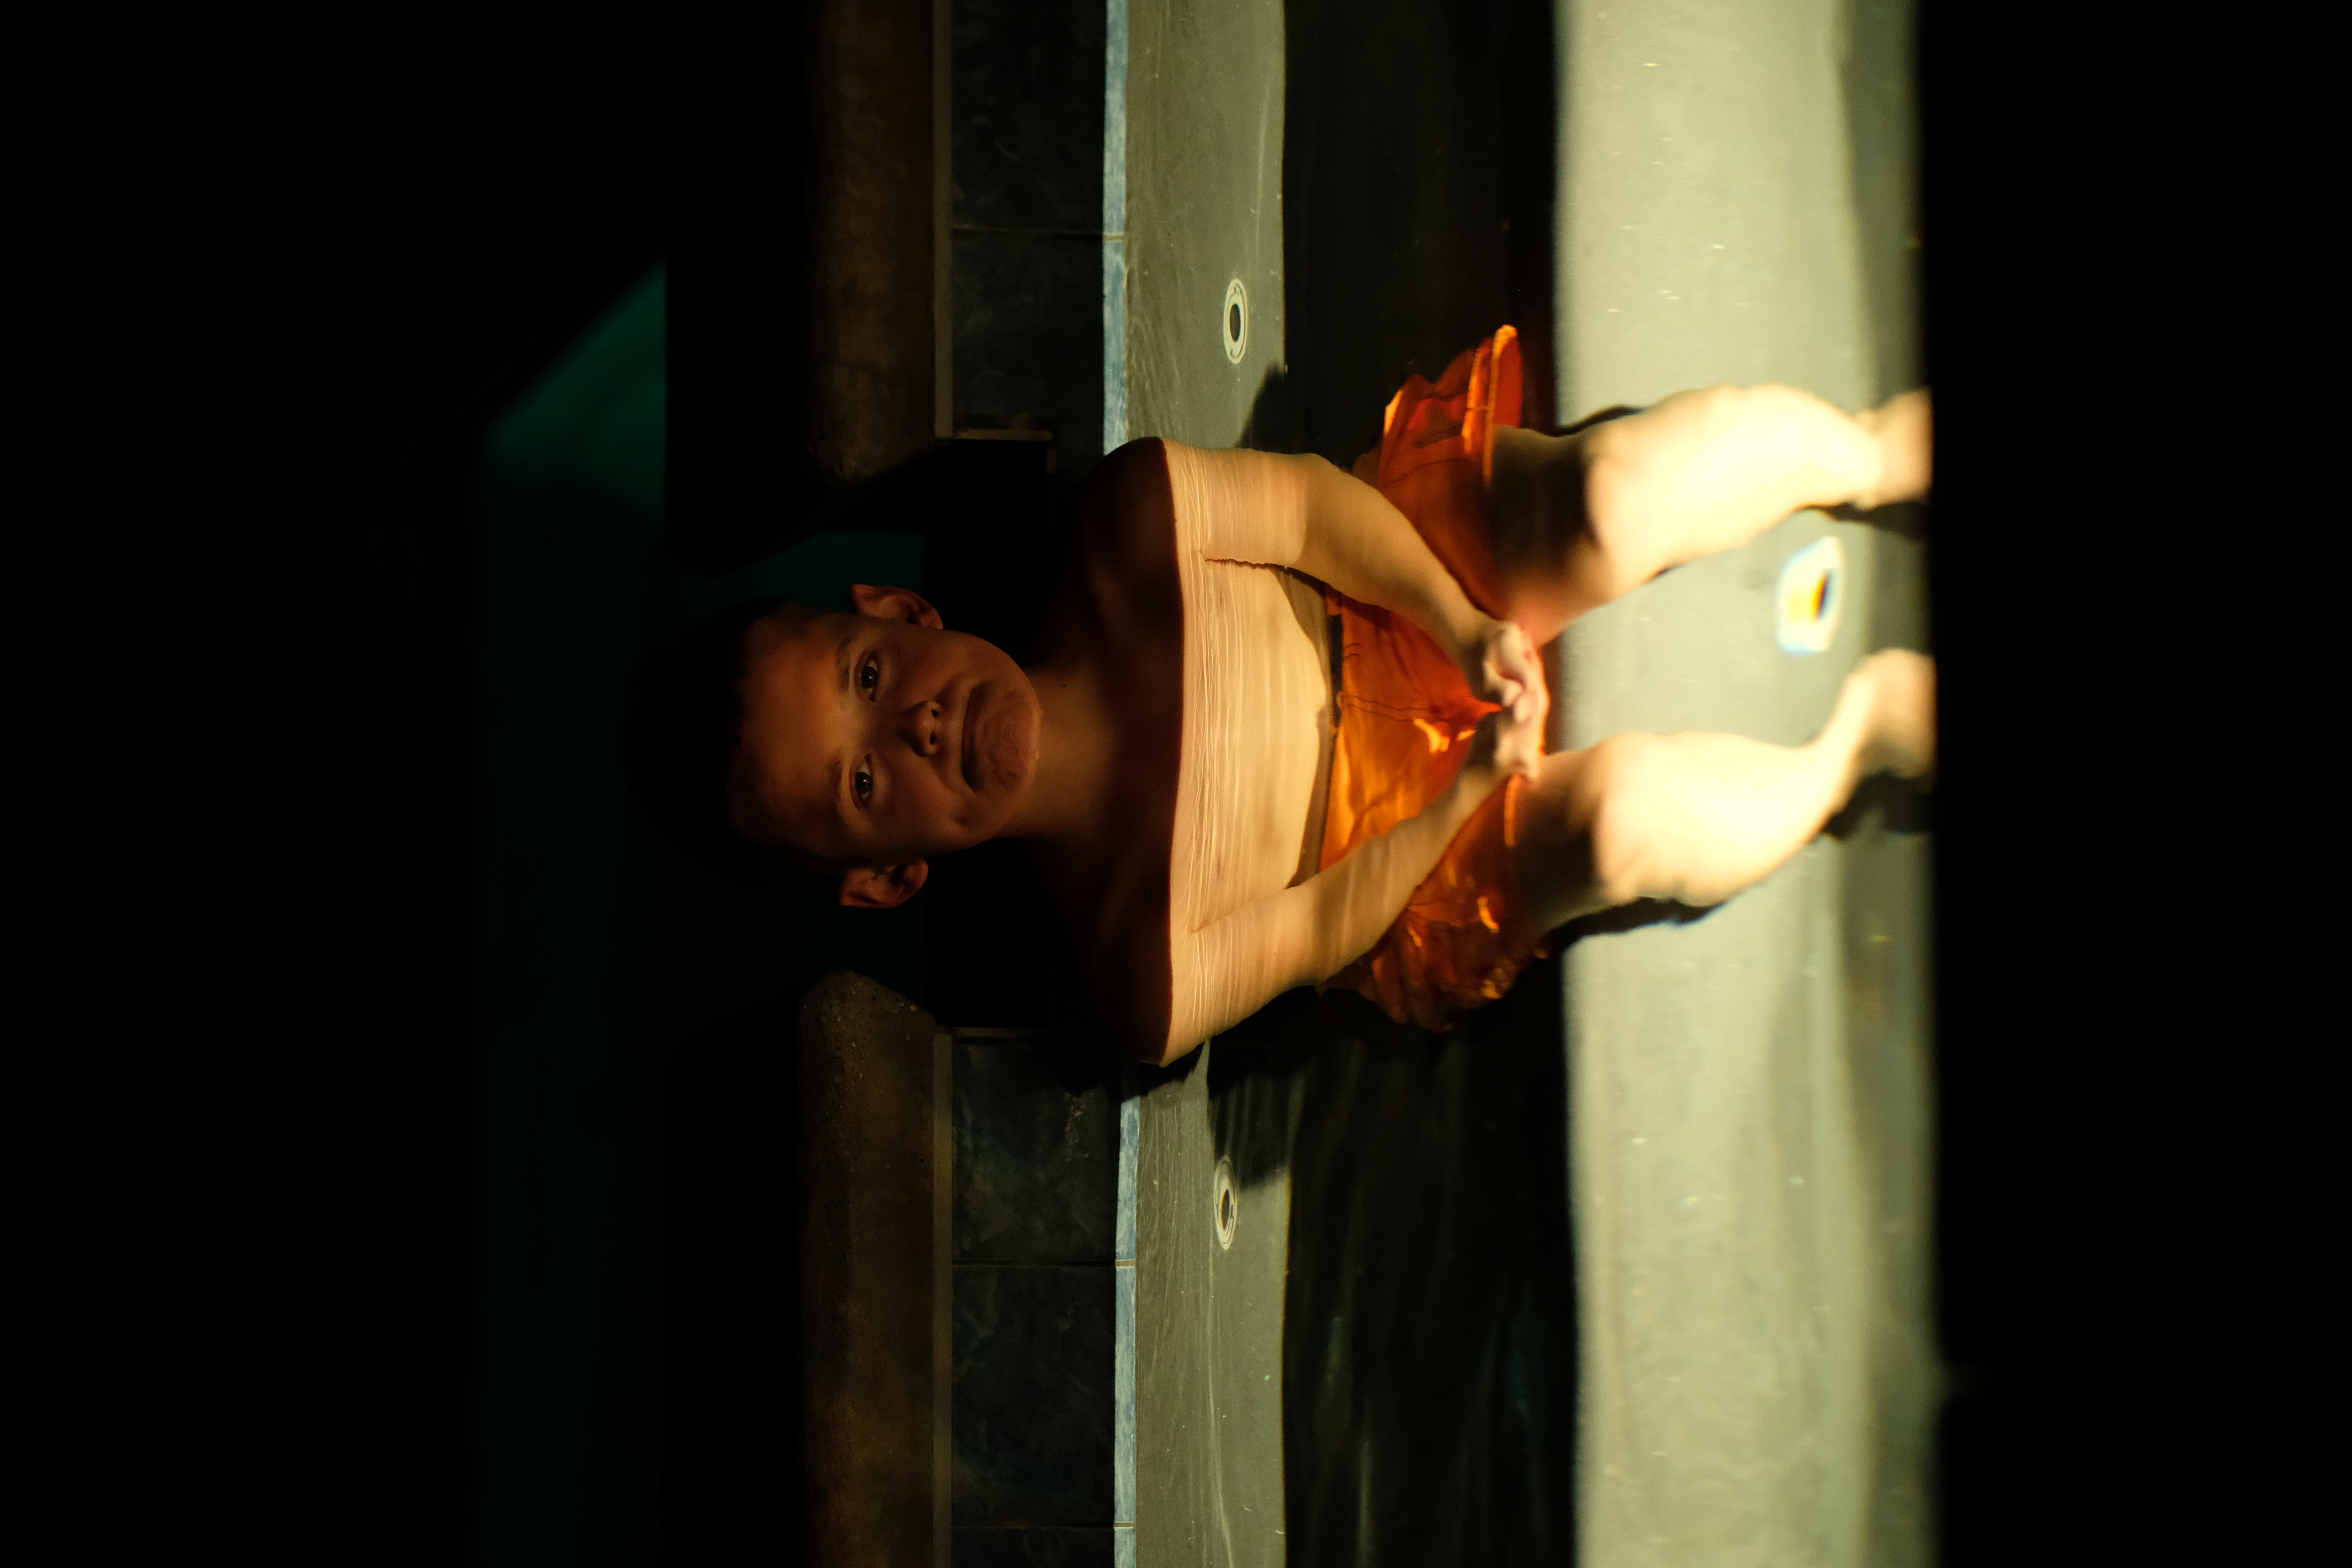
This image was the turning point for me photographically:
It captures a lot of my essence in it. Dark, gritty. It reminds me of my film days with ACROS 100.
The turning point for me photographically was going to school. I took a lab class at the local community college. Then beginning photography and intermediate photography, then a Photoshop class as well. I learned a lot about how different people approached image creation through their own personal geneses.
I watched people with film cameras adjust the ISO rating to make their exposure meter read a scene correctly (nearly always fatal) and saw people that didn’t know if they liked photography absolutely bloom. My beginning photo professor, Beck Brister, was fun and awesome. She fostered the creative spark in everyone.
Most importantly, we critiqued. Our intermediate class, run by Professor William Short, had an intense intimacy. The imagery and documentation of the student’s lives were so deep, thoughtful, and thought-provoking. I felt humbled every day I was with them.
Critique. When someone takes time out of their day to look at your image and give their insight, it is a precious gift. Be humble, gracious, and thankful.
So how does this all come together? You have seen my Trash Cam and Gull Cam on Petapixel.
The Trash CamThe Gull Cam
These were image ideas that needed hardware to realize, so I made it. I have been called technical because if I want something specific, I know how to get it or make it. I reject the idea that I am technical, however. If I am technical, then setting your camera on “M” is technical. I am fortunate enough to know enough about the things I want to do to realize it through skills I possess. That is all.
I have realized that I am a pictorialist. I am not necessarily a visual storyteller. One of my current projects is recreating the look of autochrome digitally. I wrote software to simulate the clumping of colored grains of potato starch, then evolved that software to do the heavy lifting that I used to use Photoshop for.
I have also built a few lenses to help me create my pictorialist dreams.
Sometimes I just want to have fun.
At the time of this writing, my employment is uncertain. I am looking at another potential genesis moment. I have opportunities presenting themselves that may lead me towards helping with the current pandemic, helping to better serve underrepresented demographics in the employment market. I’m not terribly sure to tell you the truth.
Time will tell, but whatever I do, I will have a camera with me at all times.
About the author: Michael Keesling is an Academy Award-winning and Emmy Award-winning technologist with a focus on rapid prototyping and deployment. The opinions expressed in this article are solely those of the author. His work has been seen in dozens of films, commercials, and television shows, including Saving Private Ryan, First Man, Star Trek Voyager, Star Trek Discovery, Minority Report, as well as The Bourne and Pirates of the Caribbean franchises. Keesling has also been awarded several patents for his inventions. You can find more of his work and connect with him on his website and LinkedIn.
Discussing what makes a “photographic” photograph can seem like a bit of a tautology, but I think that my understanding of what I’m trying to achieve with my photographs has been helped by this idea.
I first started thinking about what would make something “photographic” after seeing how many seem to be describing some pictures as “cinematic”. My understanding of what it actually means for a photograph to be/feel cinematic is that there is something more than just aspect ratio, color grading, focal length, and so on. There must be something more integral to what makes a cinematic frame cinematic, and this must be what a cinematic photograph is borrowing from.
Cinematic frames exist as part of a sequence. There are establishing, mid, close shots, and everything in-between. The function of each shot is to contribute to the overall narrative, and it can do this effectively or poorly — it’s entirely possible to have a beautifully-shot terrible movie.
If you take one beautiful cinematic frame out of its place in the finished movie, you remove its purpose and are left only with the aesthetic. It may have artistic merit from how it looks, but it won’t really mean anything out of the context it was designed to exist in.
I think that many “new wave” street photography images can feel cinematic because they often resemble an establishing shot — characters moving through a space, ambiguous silhouetted figures, wide light architecture frames. However without the context of the rest of a character’s story (as in a movie), it really doesn’t serve that function of an establishing shot — it doesn’t establish anything unless it ends up included in a series.
As an individual photograph, however, it does not have the power of the same frame used in a photo-essay, or as part of cinema; we have no investment in the location or character, and this leaves a lot of room to read into.
A photograph made in this way does not feel “photographic” to me. It does not justify its own existence but instead leans on an association, and it is that association the audience judges its quality on. If the only thing a photograph has going for it is that it reminds you of Blade Runner then that isn’t a good photograph, it’s just a reference to a good movie — and I’d get a lot more enjoyment out of the movie where the aesthetic actually means something than from looking at a still image, devoid of real character, story, and depth, and detached from any series which may provide these.
Bringing this back to my idea of a “photographic” photograph, I think that these cinematic visual references do not need to be rooted in an image made with a camera. One could produce a painting or comic panel that could contain the same visual language without even having to think about a camera, and the result would still be described as cinematic. They do not need the involvement of a camera to be brought into existence, so I see less value in them as photographs — saying a photograph feels cinematic isn’t a compliment in my eyes, it says to me that the value of that image holds is that it reminds you of something else.
Personally, I don’t want the value of my images to be that they remind my audience of something else — I want the value to be inherent to the contents of the frame. Perhaps if the image does something more, if the photograph comments on that reference, if it builds on a concept, if it adds something new, maybe a unique spin, or the photographers commentary, or reframing something familiar and refreshing it – something to make it more than just a nod, or a borrow.
My understanding of a photographic photograph is one that leans strongly into what a photograph offers differently to other mediums. To me this is less to do with an aesthetic to be achieved and more to the absolute basics – the ability to almost instantly, and usually with great accuracy, render the light in front of the lens onto a sensor or piece of film.
The speed and accuracy are the most essential aspects in my opinion, and they greatly inform my respect for the way images can be used journalistically. These photographs aren’t references to other genres or art forms, but references to history, describing powerful events through truly human moments. Their worth is inherent to the events inside the frame, not found elsewhere through implication or invocation.
In smaller-scale applications, such as personal documentary, or street photography, I think that photographs made while chasing life become a part of something more than a photographic portfolio, but contain a more intense experience. Photographs that use the photographer’s attachment or access to unique situations, freeze-frame moments of intimate emotion; these are what photography offers over than any other art medium.
When photographers chase light, shape, geometry, or mood, then I genuinely think that they may find a more fulfilling pastime in painting. There’s a good chance their vision will translate into canvas or paper; there are plenty of multidisciplinary artists who find this works for them. When the aesthetic rules what you point the camera at then there genuinely may be a benefit in working on a way to produce that aesthetic elsewhere. Many photographs could have just as valid an existence as a painting. Still life, landscapes, posed portraits; they could even work as poems or songs.
A painting can capture an expression, but it isn’t real in the same way a photograph is. Unless the urgency of the image is grounded in reality, to show that something really looked like this, or that an event really happened then it could take any other form. That sketched expression or watercolor cloud doesn’t have the same weight coming from the painter’s eye and brush over many hours as the exact moment captured fleetingly.
This is what a photographic photograph offers, and these reasons are why the subject of my own photography has increasingly moved away from anything I would believe seen as anything other than light recorded through a camera.
About the author: Simon King is a London based photographer and photojournalist, currently working on a number of long-term documentary and street photography projects. The opinions expressed in this article are solely those of the author. You can follow his work on Instagram. Simon also teaches a short course in Street Photography at UAL, which can be read about here.
Razer has updated its top of the line laptop for creative professionals: The Razer Blade 15 Studio Edition. This update–which comes just 7 months after Razer unveiled the very first ‘Studio Edition’ Blade–packs even more power into the laptop, while fixing basically every gripe that we had with the first version when we reviewed it last year.
In some ways, this update to the Blade 15 Studio parallels Apple’s recently released 13-inch MacBook Pro: it’s an important spec bump that includes a 10th-gen Intel CPU, more RAM, more storage capacity, and fixes what was a very annoying keyboard.
The difference, of course, is that the Blade 15 Studio Edition is a top of the line powerhouse that’s meant to compete with much more powerful machines, like the 16-inch MacBook Pro and the latest spate of 10th-Gen laptops. Thanks to these new specs, it will definitely be able to do that. You can see the new Blade 15 Studio Edition in action in this “Made with Razer” promo video:
Inside the latest Blade you’ll find a 10th-gen 8-core Core i7-10875D CPU, support for up to 64GB of RAM, support for up to 4TB of NVMe SSD storage, and that insane enterprise-grade NVIDIA Quadro RTX 5000 GPU with 16GB of its own VRAM. The previous variant maxed out with a 6-core processor, 32GB of RAM, and 2TB of storage, putting it at a disadvantage against competitors like the 16-inch MBP. No longer.
The other major improvement–and something we harped on in our review–is that Razer finally fixed their infuriating keyboard layout. No longer is the right Shift key located to the right of the up arrow. Instead, it’s been almost comically elongated, fixing that frustrating layout issue once and for all.
The Blade 15 Studio Edition doesn’t disappoint on the display front either. Like its predecessor, it uses an HDR400 certified 4K OLED display with 100% DCI-P3 coverage, that comes custom calibrated from the factory and promises a very low Delta-E. It’s a 60Hz display, but it does also feature an ultra low 1ms response time, in case you want to use it for some gaming, since the laptop’s hardware will be able to tear through any AAA title you want to throw at it.
Finally, in terms of ports, the Razer still delivers in all of the ways that Apple has decided not to. Namely: you get one Thunderbolt 3 port, one USB Type-C port (USB 3.1 Gen 2 with Power Delivery), two USB Type-A ports (USB 3.1 Gen 2), an HDMI 2.0B port, and a UHS-III SD card reader. No dongle life for you. And as a bonus, you can now charge the computer through the USB-C and Thunderbolt ports.
Here’s a closer look at the laptop from all angles:
Like its predecessor, the new Razer Blade 15 Studio Edition doesn’t come cheap. Thanks in large part to that Quadro 5000 card, the Blade Studio will run you $4,300 with a 8-core CPU, 32GB of RAM, and 1TB of NVMe storage. There’s currently no way to configure more RAM or storage into your computer at check out, so it seems those upgrades would need to be done at home.
However, if you don’t need the Quadro card (and most photo/video professionals don’t) you can opt for the Blade 15 Advance with almost identical specs–same CPU, same display, 16GB of RAM upgradable to 64GB, 1TB of storage upgradable to 4TB, SD card slot–which uses an NVIDIA RTX 2080 Super Max-Q GPU instead at a much more manageable $3,300 price tag.
We’re hoping to get a review unit of the Blade 15 Studio Edition in soon, so stay tuned to find out just how much of a photo editing performance bump this latest model offers over the first generation.
Andrew of the YouTube Channel Andrew & Denae is back with another helpful “blind taste test” for camera lovers. This time, he’s not comparing color science—he’s comparing the results from Fuji’s X-Trans sensors agains images captured through a standard Bayer Filter.
For anyone who needs a refresher, Fuji’s X-Trans sensors replace the standard Bayer filter with a different type of color filter of Fuji’s own design. The special 6 by 6 pattern of Fuji’s color filter allegedly eliminates moire, allowing Fuji to leave out the low-pass filter found in most digital cameras, thereby increasing resolution. It does, however, come with some drawbacks as well, including some well-known imaging artifacts.
But how noticeable are these artifacts? Can you even see the difference if you’re not looking for it, and weren’t they largely solved by the latest iteration of X-Trans? That’s what Andrew wanted to find out. So he shot multiple scenes using four different cameras: a Fuji X-A5 (Bayer), an X-T100 (Bayer), an X-T20 (X-Trans III) and an X-T4 (X-Trans IV).
As with some of the previous blind tests that we’ve featured, Andrew provides a ton of sample images, each of them labeled A, B, C, or D. He shows the full image followed by some extreme crops, and then reveals which letter corresponds to each camera at the very end of the video.
If you want to get the most out of this comparison, don’t skip to the end; actually look at the photos—you can download the full-res JPEG and RAW files at this link—see if you can spot any artifacting, and pick your favorites. That way you can find out if you honestly prefer the photos taken on the X-Trans sensors, or those shot through a regular Bayer filter.
Here’s a selection of just three of the scenes Andrew shot (click for full resolution):
Camera A
Camera B
Camera C
Camera D
Camera A
Camera B
Camera C
Camera D
Camera A
Camera B
Camera C
Camera D
Okay, now that you’ve had a chance to look at the photos and draw an unbiased conclusion, below are each of the four cameras’ identities:
Camera A: X-T100 (Bayer)
Camera B: X-A5 (Bayer)
Camera C: X-T3 (X-Trans 4 Sensor)
Camera D: X-T20 (X-Trans 3 Sensor)
Since this is more about letting the photos speak for themselves, Andrew holds off on sharing his opinions after doing this blind test himself. All he reveals is that he “learned some things,” which implies that the results really did surprise him on some level, despite his extensive experience shooting both types of cameras.
If you haven’t already, check out the full video up top. And if you want to look at all of the images for yourself, in full resolution, in both RAW and JPEG, click here to download all of the results and pixel peep to your hearts’ content.